
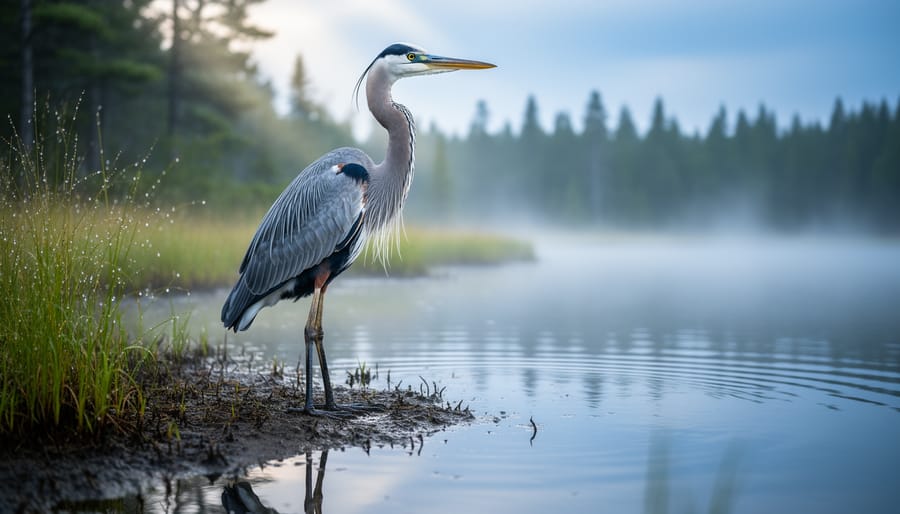
Capturing sharp, compelling images of Ontario’s wildlife requires three core techniques: mastering long-lens stability, reading animal behaviour to anticipate action, and adapting your camera settings to the province’s shifting forest light. Whether you’re photographing a great blue heron fishing in Algonquin’s marshes or a white-tailed deer browsing at dawn in Killarney, success hinges on patience, preparation, and understanding how your subject moves through its habitat.
Wildlife photography in Ontario presents unique challenges. Dense boreal forests mean working with dappled light and sudden shadows. Shy species like moose and lynx demand careful field craft and quiet approach techniques. Weather swings from humid summer mornings to crisp autumn afternoons, each requiring different ISO and shutter speed strategies. And unlike controlled studio work, you’re photographing subjects that don’t wait for you to fumble with settings.
The good news? Ontario’s provincial parks and conservation areas offer extraordinary access. You don’t need a safari budget or a seaplane charter. A patient morning at Presqu’ile Provincial Park during spring migration can yield hundreds of opportunities, from warblers to raptors. The challenge isn’t finding wildlife; it’s being ready when a fleeting moment unfolds.
This guide walks you through the gear that matters, the camera settings that work in real Ontario conditions, and the field techniques that separate lucky snapshots from portfolio-worthy images. You’ll learn how to stay safe around unpredictable animals, respect sensitive habitats, and return home with photographs that capture the wild character of this province. No fluff, no generic advice copied from African savanna guides. Just practical, tested methods for the ecosystems you’ll actually encounter here.
Essential Gear and Materials for Ontario Wildlife Photography
Camera Bodies and Lenses
Choosing the right camera body depends on your budget and how often you’ll photograph Ontario wildlife. Crop-sensor cameras (APS-C) give you extra reach, a 300mm lens becomes effectively 450mm, which helps when shooting wary subjects like deer or waterfowl across wetlands. Full-frame sensors excel in low light, crucial for forest photography where thick canopy limits sunlight. Either works; prioritize fast, accurate autofocus. Look for continuous tracking (AI Servo or AF-C) that locks onto moving subjects, especially helpful when photographing birds in flight or aquatic wildlife active at dawn.
For lenses, a 100-400mm or 150-600mm telephoto covers most Ontario scenarios. The 400mm range works beautifully for lakeside herons and forest songbirds, while 600mm lets you maintain respectful distance from bears or moose. A 70-200mm serves as a lighter backup for closer encounters. Image stabilization matters when handholding in boats or on uneven trails. If you’re starting out, rent before buying, many Toronto camera shops offer weekend telephoto rentals, letting you test reach and weight on actual park outings.
Support and Protection Equipment
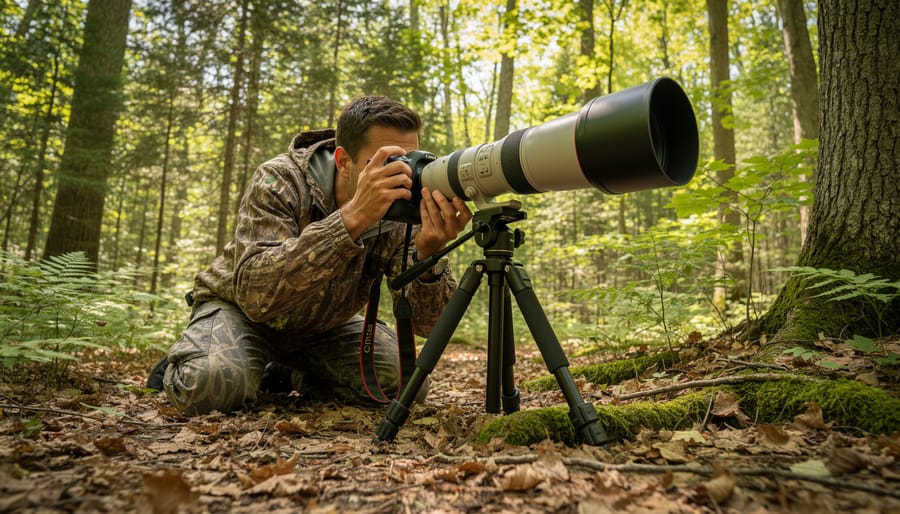
A sturdy support system transforms shaky handheld shots into gallery-worthy images, especially when you’re working with heavy telephoto lenses on Ontario trails. Tripods offer maximum stability for stationary subjects like nesting loons or foraging deer, but they’re cumbersome on muddy portages and crowded boardwalks. I carry a carbon-fiber monopod instead, it weighs under two pounds, doubles as a hiking staff, and lets me pivot quickly when a hawk suddenly takes flight.
For ground-level setups, a bean bag draped over a log or your backpack creates a stable platform without digging tripod legs into sensitive vegetation. This matters in fragile wetland edges where even small disturbances can alter bird behavior.
Rain covers are non-negotiable in Ontario’s unpredictable weather. A simple plastic sleeve protects your gear during sudden downpours without adding bulk. Pair it with a lens hood to shield your front element from mist and stray branches.
Keep your footprint small: choose multi-use gear, pack out everything you bring, and never clear brush to create “better” shooting lanes. The wildlife you’re photographing depends on those intact habitats.
Safety First: Protecting Yourself and the Wildlife
Before you venture into Ontario’s forests and wetlands with your camera, you need to understand that wildlife photography carries real risks, to both you and the animals. Your safety depends on respecting boundaries, preparing for environmental hazards, and recognizing when a shot isn’t worth the potential harm.
Ontario parks enforce strict regulations about wildlife distance, and these aren’t arbitrary rules. They exist because stressed animals can become aggressive or abandon nests, young, and critical feeding areas. Provincial parks typically require photographers to stay at least 30 meters from most wildlife, with greater distances for predators and nesting birds. A telephoto lens brings subjects close optically while you remain at a safe physical remove. If an animal changes behavior because of your presence, stops feeding, watches you intently, moves away, you’re too close.
Bear encounters demand specific protocols. Make noise as you hike (talking, clapping periodically) so you don’t surprise a bear on the trail. Carry bear spray in an accessible holster, not buried in your pack. If you spot a bear, don’t run, back away slowly, speak in a calm voice, and make yourself appear larger. A mother with cubs is especially dangerous; leave the area immediately. Moose, despite their placid appearance, kill more people in Canada than bears do. Bulls in fall rut and cows with calves are unpredictable and can charge with little warning.
Ticks carrying Lyme disease are increasingly common in southern Ontario. Wear light-colored clothing so you can spot them easily, tuck pants into socks, apply DEET to exposed skin, and perform thorough tick checks after every outing. I learned this lesson the hard way after a day photographing warblers in deciduous forest near Kingston.
Weather in Ontario shifts quickly. Spring and fall mornings can drop below freezing even when afternoons are mild, so layer clothing you can add or remove. Hypothermia sneaks up on you when you’re sitting still in a blind during a cold rain. Conversely, summer humidity can lead to heat exhaustion faster than you expect, especially when you’re carrying heavy gear. Bring more water than you think necessary.
Ethical photography means prioritizing animal welfare over any image. Never bait wildlife to lure them closer, play calls during nesting season, or manipulate habitat for a cleaner background. Leave No Trace principles apply: pack out everything you bring in, stay on established trails to avoid trampling sensitive vegetation, and camp only in designated areas. Your presence should be invisible after you leave.
Step-by-Step: Mastering Camera Settings for Ontario Wildlife
Shutter Speed and Freezing Motion
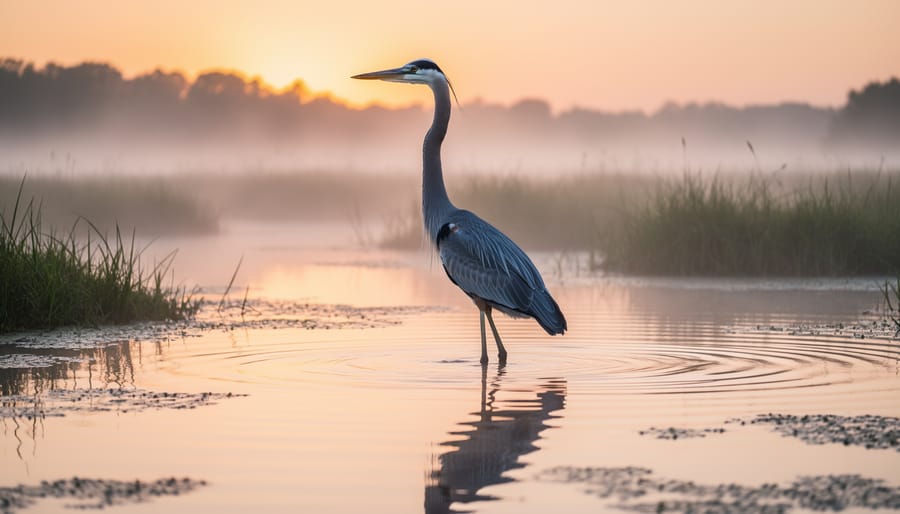
When it comes to freezing motion in Ontario’s wildlife, shutter speed is your most critical setting. For birds in flight, you’ll need at least 1/1000s to capture sharp details, and when geese take flight over wetlands at dawn, pushing to 1/1600s or faster ensures crisp wingtips against that soft morning light. I’ve learned this the hard way after dozens of blurred heron shots in Presqu’ile Provincial Park.
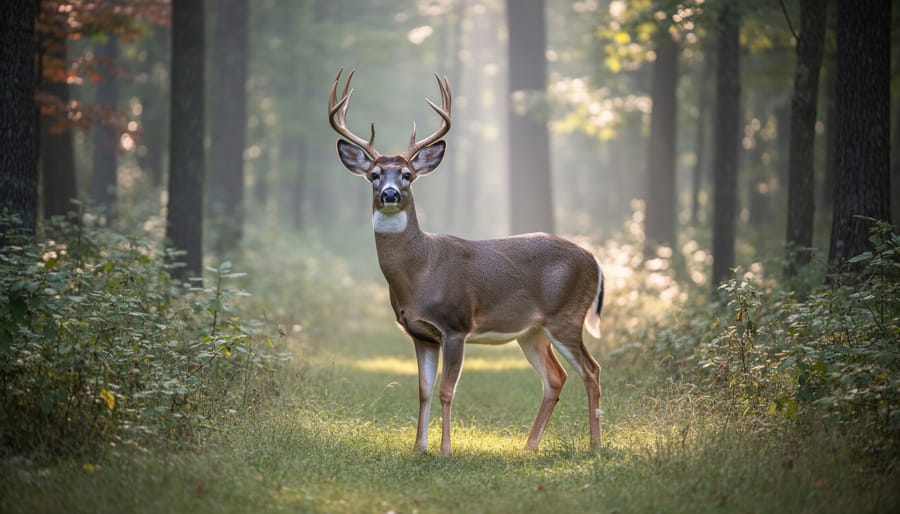
Mammals moving through brush demand different speeds depending on their pace. White-tailed deer browsing slowly through hardwoods look sharp at 1/250s, but if they bolt or leap, bump up to 1/500s minimum. For bears ambling along trails in Algonquin, 1/320s typically works well. Stationary subjects like perched owls or resting foxes allow you to drop to 1/125s or even 1/60s if you’re using proper support, though I rarely go below 1/250s to account for subtle movements like head turns or wind ruffling fur.
The general shutter speed for birds rule is simple: faster is safer, but costs you ISO or aperture flexibility. Start high, then experiment downward as conditions and subject behavior allow.
Aperture, ISO, and Exposure Triangle
Understanding the exposure triangle transforms your wildlife shots from murky shadows to crisp, well-lit images. In Ontario’s forests, where light drops to a fraction of open-marsh brightness, balancing aperture and ISO becomes critical.
Start with aperture between f/5.6 and f/8. This range keeps your subject sharp while blurring distracting backgrounds, essential when photographing a warbler against tangled branches. Going wider (f/4) gives faster shutter speeds but risks losing sharpness if your focus drifts slightly. Narrower apertures (f/11+) demand higher ISOs in dim conditions, introducing noise you’ll regret later.
ISO is your flexibility tool. In bright marshland mornings, ISO 400-800 works beautifully. Under forest canopy or during the golden hour, you’ll push to ISO 1600, even 3200. Modern cameras handle this surprisingly well, but noise creeps in. I’ve learned to accept some grain in a sharp, properly exposed image of a deer at dawn rather than a blurry shot at ISO 400.
Watch your histogram. If it’s bunched left (underexposed), bump ISO before opening your aperture too wide. Ontario’s variable conditions demand constant adjustments, what works trackside at sunrise fails completely in shaded hardwoods thirty minutes later.
Autofocus Modes and Tracking
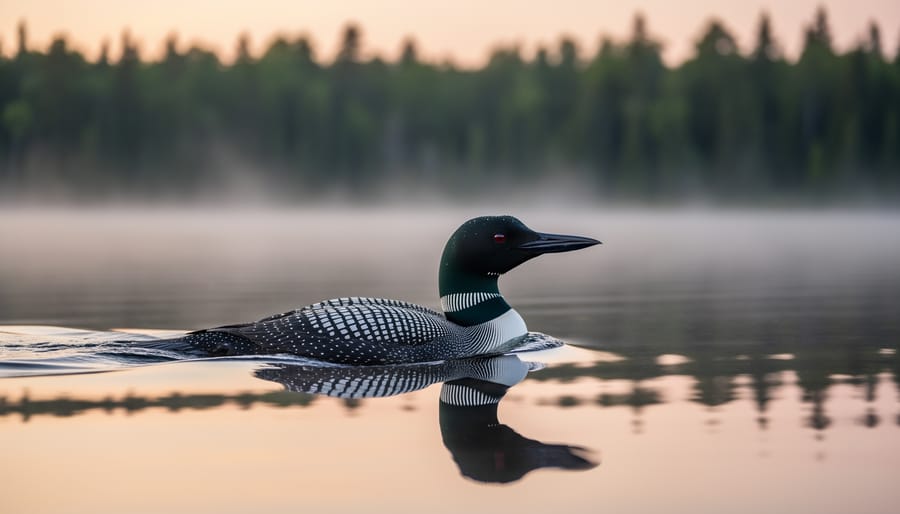
Continuous autofocus is your best friend for wildlife that won’t sit still. Switch your camera to AI Servo (Canon) or AF-C (Nikon/Sony) to keep moving subjects sharp as they wander through the frame. I learned this the hard way one June morning on Lake of Two Rivers in Algonquin, watching a Common Loon dive and resurface unpredictably. With continuous AF engaged, my camera tracked the bird’s head each time it broke the surface, saving shots I’d have missed in single-shot mode.
For autofocus area, start with zone AF rather than a single point. Zone gives you a cluster of focus points that track erratically moving animals, like a warbler hopping between branches, without losing them when they shift slightly off-center. Single-point works beautifully for stationary subjects or when you need precise eye focus on a portrait-style shot.
Back-button focus deserves special mention. Assign autofocus to a rear button (usually AF-ON) instead of the shutter release. This separation lets you lock focus, recompose, and fire without the camera refocusing mid-sequence. It takes an afternoon to retrain your thumb, but you’ll gain serious control over what stays sharp.
Field Techniques: Stalking, Positioning, and Timing
Scouting and Location Selection
Before your camera even leaves the bag, invest time in pre-trip research. Check park websites and recent visitor reports to identify which species are currently active. Wetlands attract Great Blue Herons and migrating waterfowl, while mature hardwood forests host Pileated Woodpeckers and warblers. In winter, learning to identify winter wildlife tracks in snow helps you predict where deer, foxes, and hares will return.
Study topographic maps to locate marshes, forest edges, and game trails where animals transition between cover and feeding areas. I’ve had my best success at these ecotones, the boundary between two habitats, where wildlife movement is predictable.
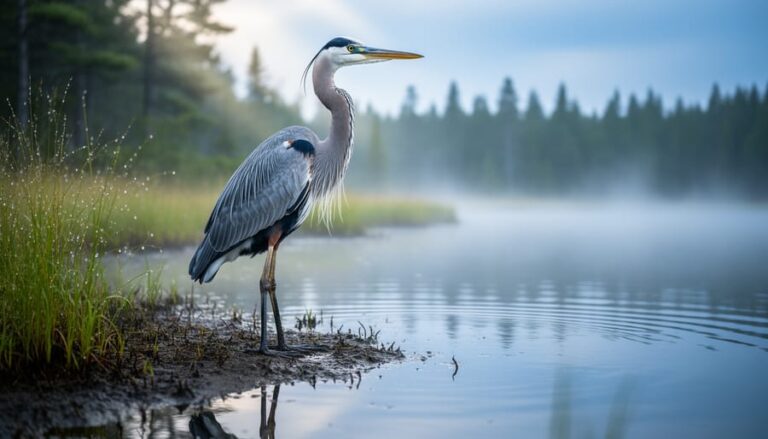
Arrive at least an hour before sunrise. Animals are most active in the cool, quiet hours before human traffic begins. This timing gives you optimal light and the chance to position yourself without disturbing already-present wildlife. Patience during the blue hour pays off when the first heron lifts from the mist.
Approaching Wildlife Without Disturbance
Patience and respect define successful wildlife photography. Move in slow, deliberate steps, sudden movements trigger flight responses. When I photographed a red fox in Frontenac Provincial Park one September morning, I spent twenty minutes covering thirty meters, freezing whenever the fox’s ears swiveled toward me.
Use trees, rocks, and terrain features as natural cover. Crouch low to break your human silhouette. Always position yourself downwind so your scent doesn’t carry to the animal. A fox can smell you from half a kilometer away.
Learn stress signals: flattened ears, raised hackles, stiff posture, or constant glancing in your direction mean you’re too close. That Frontenac fox eventually sat, groomed itself, and ignored me, the moment I knew I’d earned its tolerance. When animals feed, play, or rest naturally, you’ve found the right distance.
If an animal stops eating, stares directly at you, or moves away, back off immediately. Your photo isn’t worth disturbing their routine or forcing them to waste energy fleeing. Some encounters end with no shot, and that’s okay.
Timing and Light for Ontario Landscapes
Ontario’s light transforms dramatically with the seasons, and understanding these shifts elevates your wildlife photography from good to extraordinary. The golden hours, roughly the first hour after sunrise and the last before sunset, bathe your subjects in warm, directional light that adds dimension and glows on fur and feathers. In summer, golden hour arrives early (5:30 AM) and late (8:30 PM), giving you dual opportunities. Winter compresses this window but delivers richer orange tones through the cold, clear air.
Don’t dismiss overcast days. Thick cloud cover acts as a giant softbox, eliminating harsh shadows and bringing out detail in white birds like egrets or snowy owls that would otherwise blow out in direct sun. Overcast conditions work beautifully in Ontario’s dense forests, where dappled sunlight creates distracting hot spots on deer and moose.
Avoid midday shooting between 11 AM and 2 PM when overhead sun flattens features and wildlife typically rests in shade. Instead, use this time to scout locations or review your morning captures.
Seasonal timing matters beyond light quality. Spring and fall offer moderate temperatures that keep animals active longer, and bird migration timing creates concentrated opportunities in wetlands. Winter’s low sun angle extends golden hour but challenges you with exposure compensation for snow.
Verifying Your Results and Next Steps
After a morning photographing warblers in Rondeau Provincial Park or white-tailed deer along the Bruce Trail, take ten minutes to review your images before leaving the location. Zoom in to 100% on your camera’s LCD screen and check critical focus on the subject’s eyes, the sharpest point that makes or breaks a wildlife portrait. Examine the histogram for blown highlights (white sky behind a Great Blue Heron) or crushed shadows (underexposed forest detail). If you notice consistent issues, adjust ISO, exposure compensation, or shutter speed and reshoot while the opportunity remains.
Pay attention to composition beyond just technical settings. Are the animal’s eyes in sharp focus? Is there breathing room in the frame direction the subject is facing? Did you capture behavior or just a static pose? These quick field reviews train your eye faster than any post-shoot critique at home.
Start a simple field journal, either paper or digital notes on your phone. Record the park name, date, weather conditions, species photographed, and the camera settings that delivered your best shots. After a few outings, patterns emerge. You’ll remember that 1/1250s at f/6.3, ISO 800 nailed flying gulls at Presqu’ile in overcast light, or that early morning mist at Algonquin required pushing ISO to 1600 for sharp loon portraits.
Building a sustainable practice means setting realistic goals. Commit to one local park per month rather than chasing distant locations constantly. Join the Ontario Nature Photography Facebook group or attend a workshop through the Toronto Wildlife Centre to learn from experienced shooters. Enter your work in the Ontario Nature annual photo contest or local camera club competitions, constructive feedback accelerates growth more than shooting in isolation.
Wildlife photography improves through repetition and reflection. Each outing teaches something new about light, animal behavior, or your gear’s limits. Keep showing up, keep learning, and keep respecting the wildlife that makes Ontario extraordinary.
Common Questions About Wildlife Photography in Ontario
Do I need a permit to photograph wildlife in Ontario parks?
Most provincial parks allow photography for personal use without a special permit, but commercial shoots typically require advance permission and may incur fees. Always check the specific park’s regulations before your visit, as some areas restrict access during sensitive wildlife breeding seasons.
Which parks are best for beginners learning wildlife photography?
Presqu’ile Provincial Park offers accessible boardwalks and predictable waterfowl populations, making it ideal for newcomers. Frontenac Provincial Park provides excellent opportunities for forest species along well-marked trails, while Point Pelee National Park concentrates migrating birds in spring, giving you multiple subjects in a compact area.
How do I handle Ontario’s unpredictable weather during shoots?
Layer your clothing so you can adjust quickly as temperatures shift, and always pack rain protection for both yourself and your gear. Spring and fall bring the most dramatic weather swings, so monitor forecasts closely and retreat to your vehicle if lightning threatens or conditions become unsafe.
What ethical guidelines should I follow when photographing wildlife?
Never bait, call, or chase animals to get a shot, if your presence changes their behavior, you’re too close. Respect nesting sites and denning areas completely, stay on designated trails to protect habitat, and prioritize the animal’s wellbeing over any photograph.
Beyond these core concerns, photographers often wonder about seasonal timing and post-processing. May through June brings nesting activity and vibrant spring plumage, while September and October offer rutting behavior in deer and stunning fall colors as backdrops. Winter photography can be rewarding but demands extra preparation for cold batteries and reduced daylight hours.
For post-processing, start with basic exposure and contrast adjustments rather than heavy manipulation. Wildlife photography celebrates authenticity, so resist the urge to oversaturate colors or blur out natural elements. Small tweaks to sharpness and shadow detail often make the difference between a snapshot and a compelling image, but the magic should come from your fieldwork, not your editing software.
If you’re curious about expanding beyond birds and mammals, Ontario’s wetlands and forests support incredible amphibian diversity. Learning where amphibians live opens up macro photography opportunities during spring and summer evenings when salamanders and frogs become active near vernal pools.
How to Check Your Work
Back at your camera or computer, a quick technical check separates keepers from misses. Zoom in to 100% magnification on your LCD or monitor and examine the eyes, they should be tack-sharp, the defining mark of a successful wildlife shot. Scan for motion blur in the body, check that your subject isn’t clipped at awkward angles by the frame edge, and verify the exposure hasn’t blown out highlights on white feathers or fur.
A winning image balances technical precision with emotional impact. The animal’s pose tells a story, the background adds context without distraction, and the light flatters rather than flattens. You’ll feel it when composition, moment, and clarity align.
If you’re consistently struggling with soft focus despite good technique, your autofocus system may need calibration, a professional camera service can fine-tune lens alignment. Similarly, if you can’t seem to nail exposure in tricky lighting even after mastering manual settings, consider a workshop with an experienced Ontario wildlife photographer. They’ll diagnose whether it’s equipment limitations or technique gaps holding you back. Sometimes an expert eye spots what hours of solo trial-and-error miss.
Mastering wildlife photography in Ontario isn’t something that happens overnight. It’s a gradual process built on patience, respect for the animals you’re photographing, and consistent practice in the field. Every outing teaches you something new, whether it’s how light filters through the forest canopy at Algonquin or how quickly a Great Blue Heron can take flight when you’ve misjudged your approach distance.
Start small. You don’t need to trek to remote wilderness areas on your first attempts. Accessible parks like Presqu’ile or Frontenac offer abundant opportunities to practice your techniques on cooperative subjects. A successful morning photographing songbirds at your local conservation area is just as valuable as capturing a moose in the backcountry. Each experience sharpens your eye, refines your camera skills, and deepens your understanding of animal behavior.
Always remember that the welfare of wildlife comes first. No photograph is worth causing stress or harm to an animal. When you prioritize ethical practices and follow park regulations, you’re not just protecting individual creatures but contributing to the preservation of Ontario’s natural heritage for future photographers and nature lovers.
Ontario’s parks and wild spaces hold incredible biodiversity, from the wetlands of Point Pelee to the boreal forests of Killarney. Grab your camera, respect the landscape, and get out there. The images you’ll create and the moments you’ll witness make every early morning and patient wait worthwhile.


+ There are no comments
Add yours