

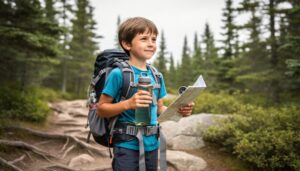
Carry a detailed topographical map and compass as your lifeline when venturing into Ontario’s wilderness – GPS batteries fail, but traditional navigation tools don’t. Master these essential survival skills before stepping into the backcountry. Build an emergency shelter within 30 minutes of recognizing you’re lost, using fallen pine boughs and natural materials abundant in Ontario’s forests. Pack a waterproof fire starter kit with strike-anywhere matches, cotton balls soaked in petroleum jelly, and a reliable lighter – fire means warmth, signal for rescue, and safe drinking water. When darkness falls in our northern wilderness, these basic tools and knowledge transform from convenient backup plans into your ticket home. Remember: survival situations in Ontario’s diverse landscape don’t announce themselves – they evolve from simple day hikes and casual camping trips when least expected.
Essential Navigation Skills for Ontario’s Wilderness

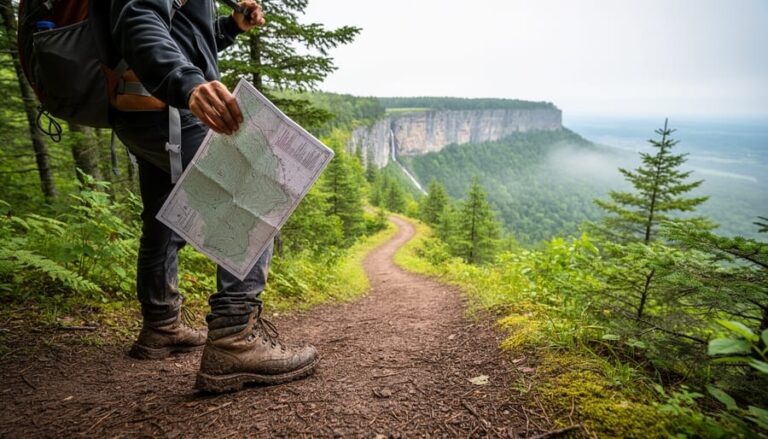
Reading Trail Markers and Maps
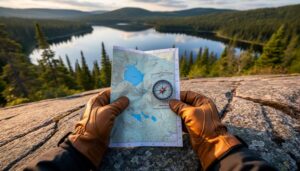
Ontario’s trail marking system is your lifeline in the wilderness, and mastering these wilderness navigation strategies could make the difference between a great adventure and getting lost. Look for the distinctive blue or yellow trail markers – blue indicates main trails, while yellow marks secondary paths. These markers are typically painted on trees at eye level and are placed frequently enough to maintain visibility from one to the next.
When reading maps, remember that Ontario parks use topographic maps with detailed elevation lines. Each line represents a specific height change, usually 10 meters. Closer lines mean steeper terrain, while spread-out lines indicate flatter areas. Always check the map’s legend for scale and symbol explanations – a seemingly short trail might be longer than you think!
Pro tip: Take a photo of the trail map at the entrance with your phone, but also carry a physical copy. Electronics can fail, but paper maps don’t need batteries! Look for natural landmarks like distinctive trees, rock formations, or stream crossings that match your map – these serve as excellent confirmation points during your hike. Remember to regularly check your position and always note which trail intersections you’ve passed.
Natural Navigation Methods
When you’re out in Ontario’s wilderness without a compass, nature provides reliable ways to find your direction. Look for moss growth on trees – while it’s not always accurate, moss tends to grow more abundantly on the north side of trees in our region, especially in dense forests. During the day, the sun is your most reliable guide. Remember that the sun rises in the east and sets in the west, with its highest point indicating south around noon.
At night, the stars become your compass. Find the North Star (Polaris) by locating the Big Dipper constellation – the two stars at the end of its “cup” point directly to Polaris. Indigenous peoples have used these celestial navigation methods in these lands for countless generations.
Natural markers like ant hills (which typically face south in Ontario) and tree growth patterns can also help. Trees often have fuller branches on their southern side due to more sunlight exposure. In winter, snow tends to melt faster on the south-facing sides of rocks and trees.
Keep in mind that these methods work best when used in combination, rather than relying on a single indicator. It’s always wise to confirm your direction using multiple natural signs before making navigation decisions.
Finding and Purifying Water in Ontario Parks
Safe Water Sources
Finding safe drinking water in Ontario’s wilderness isn’t as challenging as you might think, but knowing where to look is crucial. Our province’s countless lakes and rivers offer abundant water sources, but not all are created equal.
Spring-fed streams are your best bet, especially those flowing down hillsides or emerging from underground. These sources typically provide the cleanest water, as they’ve been naturally filtered through layers of rock and soil. Look for clear, moving water with no visible pollution or algae growth.
Small lakes and ponds can be reliable water sources, but avoid those with stagnant water or heavy algae blooms. In beaver country (which is most of Ontario!), seek water sources upstream of beaver dams to avoid giardia, often called “beaver fever.”
Moving rivers are generally safer than standing water, but remember that even the clearest stream can harbor harmful bacteria. During winter, you can melt snow or ice for drinking water, but avoid eating snow directly as it can lower your body temperature.
Here’s a local tip: Look for clusters of white birch trees, as they often indicate natural springs nearby. Also, morning dew collected on clean cloth can provide emergency drinking water when other sources aren’t available.
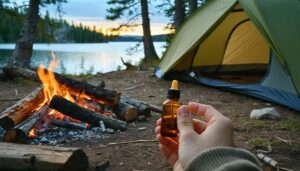
Regardless of how clean the water appears, always treat it before drinking. Boiling is the most reliable method, but carrying water purification tablets or a quality filter is highly recommended for backcountry adventures.
Purification Methods
Having access to clean drinking water is crucial for wilderness survival, and in Ontario’s backcountry, you’ve got several reliable options to make water safe for consumption. As part of your essential safety gear, always carry multiple purification methods.
Boiling is your most dependable option – bring water to a rolling boil for at least one minute (or three minutes at higher elevations). I’ve found that collecting water in the early morning and boiling it during breakfast prep is an efficient way to stock up for the day.
Chemical treatment using iodine tablets or chlorine dioxide drops is another effective method. Just remember to wait the full recommended time – usually 30 minutes – before drinking. Pro tip: pack some powdered drink mix to mask any chemical taste.
Water filters and purifiers are fantastic for on-the-go treatment. Look for ones that remove bacteria, protozoa, and other harmful microorganisms. I particularly love gravity filters for group camping – just hang them at your campsite and let gravity do the work while you set up camp.
In emergency situations, you can use the sun’s UV rays through the SODIS method: fill clear plastic bottles with water and leave them in direct sunlight for 6 hours. While not ideal, this method can work when other options aren’t available.
Remember, even the clearest stream water needs treatment – don’t let its pristine appearance fool you!
Weather-Smart Shelter Building
Quick Emergency Shelters
When you need shelter fast in Ontario’s wilderness, nature provides everything you’ll need. One of the quickest solutions is the lean-to shelter – find a low-hanging tree branch or fallen log and prop smaller branches against it at a 45-degree angle. Layer pine boughs, leaves, or spruce branches from bottom to top like shingles to keep rain out.
For protection from wind and rain, look for natural features like rock outcroppings or fallen trees. These make excellent backings for emergency shelters. If you find a large evergreen tree, the area underneath often stays dry and can provide immediate shelter while you build something more substantial.
In winter conditions, snow is your friend. A snow cave can be quickly hollowed out of a deep snowbank, providing excellent insulation. Just remember to poke a few small ventilation holes and keep the entrance slightly lower than the sleeping platform to trap warm air.
The debris hut is another lifesaver – create a small frame with sticks in an A-frame shape, then pile leaves, pine needles, and other natural materials at least two feet thick all around. This creates a cozy, insulated space that can help prevent hypothermia in emergency situations.
Remember to always build your shelter before dark and on slightly elevated ground to avoid water pooling.

Seasonal Considerations
Ontario’s diverse seasons demand different shelter-building approaches to stay safe and comfortable in the wilderness. In summer, focus on creating well-ventilated shelters that provide shade and protection from insects. A simple lean-to with a light tarp works well, allowing air flow while keeping you dry during sudden summer storms.
As autumn arrives, prioritize weather protection from both sides of your shelter, as wind patterns become less predictable. Adding a windbreak of branches and leaves on the prevailing wind side can make a significant difference in comfort. Consider positioning your shelter entrance away from typical wind directions.
Winter survival requires more robust structures. Build your shelter smaller to retain body heat, and insulate the floor with plenty of evergreen boughs or dry leaves. Snow can actually be your ally – pack it around your shelter’s sides for added insulation. If possible, create a small entrance tunnel that helps block wind and preserve warmth.
Spring brings its own challenges with frequent rain and temperature swings. Ensure your shelter has good drainage by building on slightly elevated ground. Create steep angles on your roof to shed water effectively, and maintain air gaps at the bottom of your shelter to prevent moisture buildup.
Remember, successful shelter building in any season starts with choosing the right location – away from dead trees, on relatively flat ground, and near (but not too close to) natural resources.
Wildlife Safety and Awareness

Bear Safety Essentials
When hiking in Ontario’s wilderness, knowing how to handle black bear encounters is crucial for your safety. While following basic park safety protocols helps prevent most encounters, it’s essential to know what to do if you meet one of these magnificent creatures.
First, stay calm and slowly back away while facing the bear. Make yourself appear larger by raising your arms and speak in a firm, calm voice. This lets the bear know you’re human and not prey. Never run or climb trees – black bears excel at both!
Keep your group together if hiking with others. This makes you appear more intimidating to the bear. Make noise while hiking by talking, singing, or carrying a bell to avoid surprising bears on the trail.
If a black bear follows you, stand your ground. In the rare case of an attack, fight back with everything you’ve got – rocks, sticks, or your bare hands. Unlike grizzlies, playing dead doesn’t work with black bears.
Remember to store food properly at your campsite by using bear-proof containers or hanging food packs at least 4 meters high and 2 meters away from the trunk of a tree. Clean up all food scraps and avoid cooking near your tent. These simple precautions will help keep both you and our wild friends safe in their natural habitat.
Other Wildlife Precautions
While bears often get the spotlight in wilderness safety discussions, Ontario’s forests are home to other wildlife that demands equal respect and caution. Moose, despite their seemingly gentle nature, can be particularly dangerous during mating season or when protecting their calves. If you encounter a moose, slowly back away while maintaining visual contact, and try to put a large object like a tree between you and the animal.
Wolves generally avoid human contact, but if you spot one, make yourself appear large by raising your arms and making noise. Never run, as this might trigger their chase instinct. Instead, back away slowly while facing the wolf. Traveling in groups and keeping a clean campsite significantly reduces the likelihood of wolf encounters.
Smaller wildlife can also pose challenges. Raccoons and squirrels are notorious for raiding food supplies, while porcupines might chew on equipment for salt. Store your food in animal-proof containers and hang them from trees at least 4 meters high and 2 meters from the trunk. When hiking, make noise by talking or wearing a bell to alert wildlife of your presence – most animals prefer avoiding human contact altogether.
Remember, wildlife encounters are rare if you take proper precautions. Respect their space, never feed them, and maintain a safe distance. These animals are an integral part of Ontario’s wilderness, and observing them from afar can be one of the most rewarding aspects of your outdoor adventure.
Emergency Signaling
When you need help in the wilderness, getting noticed is crucial. The universal distress signal is three of anything – whether it’s whistle blasts, fires, or flashes from a mirror. As a frequent hiker in Ontario’s backcountry, I always carry a whistle and a small signal mirror in my pack.
For daytime signaling, a signal mirror is incredibly effective – on a clear day, its flash can be seen up to 10 kilometers away. Simply hold the mirror close to your eye and point it toward the sun, creating a bright reflection you can direct toward aircraft or distant locations.
After dark, three fires arranged in a triangle or straight line are the international symbol for distress. Space them about 30 meters apart for visibility from the air. If you’re conserving resources, maintain one main fire and keep materials ready to quickly light the other two when you hear aircraft.
For ground-level signaling, create large SOS letters using contrasting materials – dark logs on snow, or rocks on grass. Make each letter at least 3 meters tall to be visible from above. In winter, stamp out letters in deep snow or use fallen pine boughs to create contrast.
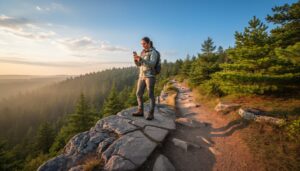
Remember, your cell phone can still be useful even without service – the flash can serve as a signal light, and rescuers can sometimes track your last known location through your phone’s GPS.
Surviving in Ontario’s wilderness is all about being prepared and keeping a level head when challenges arise. Remember, the key to outdoor safety lies in the basics: always carry essential survival gear, know how to navigate using multiple methods, and understand the fundamentals of shelter building and fire starting. Equally important is staying informed about local weather patterns and wildlife behavior – knowledge that could make all the difference in an emergency.
Before heading out, always share your trip plans with someone you trust and familiarize yourself with the specific area you’ll be exploring. Practice your survival skills regularly in controlled environments, so they become second nature when you need them most. Even experienced outdoor enthusiasts should regularly review and update their survival knowledge and gear.
Most importantly, remember that prevention is your best survival strategy. Pack appropriately, stay aware of your surroundings, and make conservative decisions when faced with uncertainty. The wilderness can be both beautiful and challenging – approach it with respect, preparation, and confidence in your abilities to handle whatever nature might throw your way.


+ There are no comments
Add yours