

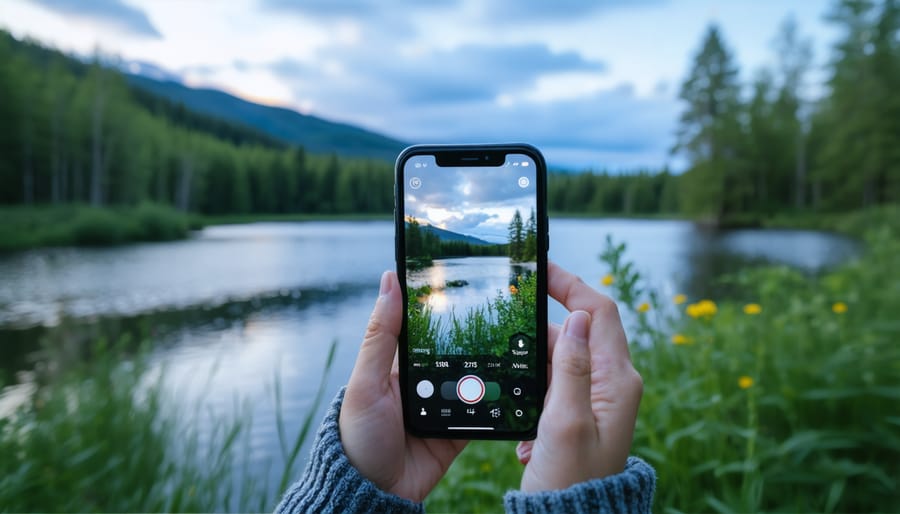
Tap your screen to lock focus and exposure on your main subject before hitting the shutter button—this single technique transforms flat, washed-out park photos into professional-looking shots with proper lighting and sharp detail. Your smartphone already contains everything needed to capture stunning images across Ontario’s most photogenic parks, no expensive camera required.
Clean your lens with a microfiber cloth before each shooting session, since pocket lint and fingerprints create that frustrating hazy effect that ruins otherwise perfect compositions. Position yourself low to the ground when photographing wildflowers or forest floor details—getting down to eye level with your subject creates intimate, immersive perspectives that viewers can’t scroll past.
Shoot during golden hour (the first hour after sunrise or last hour before sunset) when warm, directional light adds depth and drama to landscapes, turning ordinary trail scenes into frame-worthy memories. Enable your phone’s gridlines and use the rule of thirds by placing key elements along those lines rather than dead center, instantly elevating your compositions from snapshot to storytelling.
Turn on HDR mode for high-contrast scenes like sunlit meadows against dark forest backgrounds—your phone captures multiple exposures and blends them automatically, revealing detail in both shadows and highlights that single exposures miss. These smartphone-specific techniques level the playing field, proving that the best camera is truly the one you have with you on the trail.
Why Your Smartphone Is Perfect for Ontario Parks
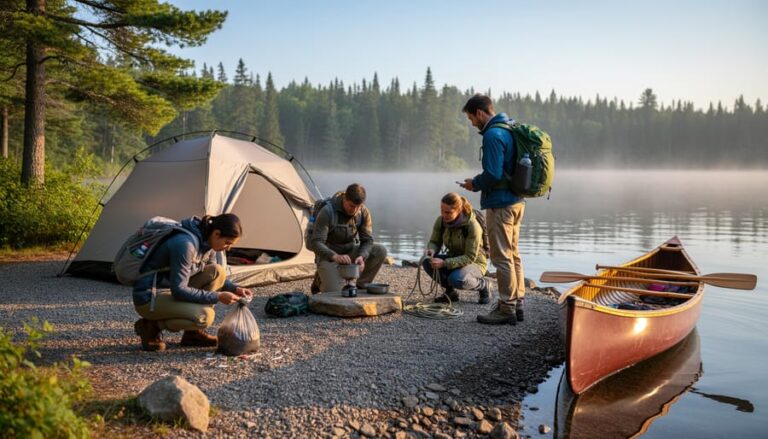
Let’s be honest—how often do you leave home without your phone? Exactly. That’s what makes it the ultimate camera for exploring Ontario’s parks. While your fancy DSLR sits at home collecting dust (because who wants to lug 10 pounds of gear up a trail?), your smartphone is already in your pocket, ready to capture that unexpected moose sighting or perfect sunset.
“I used to trek into Algonquin with a full camera bag, multiple lenses, and a tripod,” shares Toronto photographer Marcus Chen. “One rainy afternoon, my phone captured better shots than my expensive gear ever did—and I actually enjoyed the hike instead of worrying about my equipment.”
Modern smartphones are surprisingly tough cookies. Many current models boast water and dust resistance, perfect for Ontario’s unpredictable weather. Caught in a sudden downpour at Killarney? Your phone handles it. Mist from Niagara Falls? No problem. Try that with a $3,000 camera body.
The instant sharing capability transforms your park experience, too. Snap a photo of the Sleeping Giant’s dramatic cliffs, edit it quickly using our iPhone photography secrets, and share it with friends before you’ve even descended the trail. It’s perfect for those “wish you were here” moments that inspire others to explore Ontario’s natural beauty.
Sarah Kim, a regular visitor to Bruce Peninsula, switched exclusively to phone photography last year. “I’m hiking 15 kilometers—every ounce matters,” she explains. “My phone weighs nothing, fits anywhere, and the photos are stunning. Plus, I can use hiking apps and my camera simultaneously.”
The best camera, as they say, is the one you have with you. And in Ontario’s parks, that’s undoubtedly your smartphone—always ready, surprisingly capable, and perfectly suited for capturing adventure without weighing you down.
The Golden Hours: When to Shoot in Ontario’s Parks
Here’s the truth about park photography: timing really is everything. I learned this the hard way during my first visit to Algonquin Park when my midday photos looked washed out and flat. Once I discovered the magic of golden hour, everything changed.
The golden hour happens twice daily—roughly the first hour after sunrise and the last hour before sunset. During these windows, sunlight travels through more atmosphere, creating that warm, soft glow that makes your cellphone photos look professionally shot. In Ontario’s parks, this means your waterfall shots at Hilton Falls Conservation Area transform from harsh and shadowy to dreamy and dimensional.
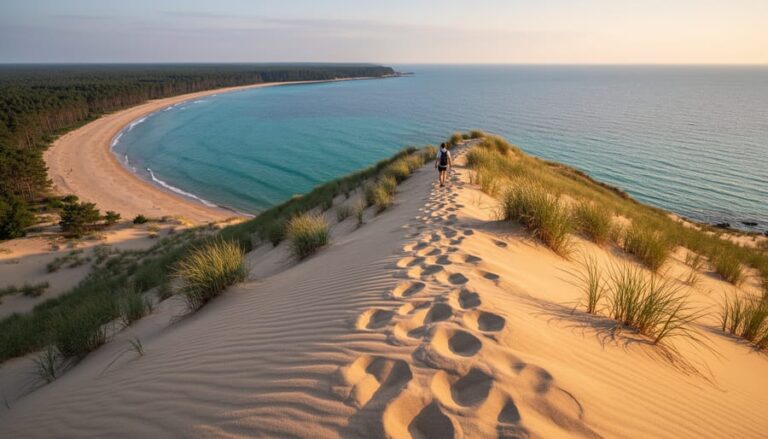
Summer golden hours in Ontario stretch from about 5:30-6:30 AM and 8-9 PM, giving you flexibility. I love shooting at Sandbanks Provincial Park during these times when the dunes practically glow orange. Winter golden hours are shorter—think 7:30-8:30 AM and 4-5 PM—but the low sun angle creates stunning long shadows across frozen Georgian Bay.
Here’s an insider tip: overcast days are your secret weapon. Clouds act like nature’s softbox, diffusing harsh light beautifully. I’ve captured some of my favourite shots at Rouge National Urban Park on cloudy mornings when the forest takes on an ethereal quality.
Each season offers unique lighting opportunities. Spring’s misty mornings at Awenda Provincial Park create atmospheric shots, while autumn’s golden hour intensifies fall colours at Bon Echo. Even harsh midday light works if you’re photographing dramatic landscapes like the cliffs at Killarney Provincial Park—just embrace the contrast.
Set your alarm early, pack a thermos, and trust me—those sunrise photos will be worth leaving your warm sleeping bag.
Composition Tricks That Transform Ordinary Park Photos
The Rule of Thirds (And When to Break It)
Most smartphones have a grid feature that overlays nine equal rectangles on your screen—and trust me, turning it on is a game-changer for Ontario park photography. This grid follows the “rule of thirds,” a classic technique where you position your subject along the lines or at the intersections rather than dead center.
When photographing Algonquin’s misty lakes at sunrise, place the horizon along the top or bottom third line instead of splitting your image in half. This creates instant visual interest and gives your scene breathing room. For wildlife shots, position that curious deer or loon at one of the four intersection points—your eyes naturally gravitate there, making for more compelling images.
That said, rules are meant to be broken! Sometimes a perfectly centered composition works beautifully, especially for symmetrical scenes like a canoe’s reflection in still water or a trail disappearing into the forest. I’ve captured some stunning shots by intentionally ignoring the grid when photographing towering pine trees or dramatic rock faces at Killarney.
**Insider tip**: Enable your grid in settings (usually under Camera > Grid), practice with it on every shot for a week, then start experimenting with breaking the rule intentionally. You’ll quickly develop an eye for what works.
Leading Lines Through the Forest
Nature provides the perfect compositional tools—you just need to recognize them. When you’re exploring Ontario’s parks, look for natural elements that create lines drawing your eye deeper into the scene. That winding trail disappearing into the forest? Pure photographic gold. Position yourself so the path enters from a corner of your frame and curves through the middle, leading viewers on a visual journey.
Fallen logs work beautifully too, especially alongside streams or cutting diagonally across your composition. I’ve found some of my most captivating shots by simply crouching low and using a moss-covered log as a leading line toward a waterfall or sunlit clearing. Shorelines are another fantastic option—that natural curve where water meets land creates movement that guides the eye effortlessly.
Here’s an insider tip: tap your phone screen to focus on a point about one-third into your leading line rather than right at the front. This keeps the entire path sharp while maintaining depth. And remember to position yourself at different angles—sometimes stepping just a few feet to the left or right transforms a good leading line into a spectacular one. These natural guides turn simple snapshots into photographs that truly transport viewers into Ontario’s wilderness.
Framing with Nature’s Architecture
Nature provides some of the most stunning frames you’ll ever find—and they’re completely free! When exploring Ontario’s parks, keep your eyes open for natural archways created by overhanging branches, rocky outcrops that form interesting windows, or fallen logs that create leading lines toward your subject.
I discovered this technique by accident at Killarney Provincial Park when I framed Georgian Bay through a gap between two towering pines. The branches created a natural vignette that drew the eye straight to the sparkling water beyond. Your phone’s camera loves these compositional tools because they add instant depth and context to otherwise flat images.
Try positioning yourself so tree branches hang into the top third of your frame, or shoot through cave openings and rock formations. Even tall grasses can create a soft, dreamy foreground when you tap to focus on your main subject behind them. The key is getting low or high—don’t just shoot from standing height.
**Insider tip**: Slightly dirty or wet branches add texture and authenticity. Don’t clean them off! These natural imperfections tell the story of the real outdoors, making your photos feel more immersive and genuine.
Capturing Ontario’s Signature Park Moments
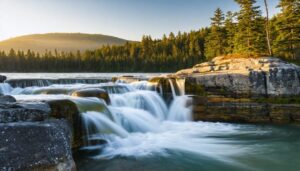
Waterfall Photography Without the Blur
Ontario’s stunning waterfalls deserve photos that match their beauty! For that dreamy, silky-smooth effect, your phone needs a longer exposure. Enable “Live Photo” on iPhone or use a long exposure app on Android—then keep your phone incredibly steady (a small tripod works wonders, or brace against a rock). The water movement creates that ethereal blur while rocks stay sharp.
Want crisp, dramatic detail instead? Use your phone’s fastest shutter speed setting or simply tap the screen to focus and snap quickly. Early morning light makes water droplets sparkle like diamonds! Here’s an insider tip: try both styles at the same location—waterfalls like Webster’s Falls or Albion Falls transform completely depending on your technique.
Remember to protect your phone from mist with a simple ziplock bag (cut a hole for the lens). Stay on designated viewing platforms to keep yourself safe and minimize environmental impact while getting that perfect shot.
Lake Reflections That Look Like Glass
Early morning is your golden ticket for those jaw-dropping, mirror-like lake shots. Aim to arrive at least 30 minutes before sunrise when the water is typically calmest—no wind means no ripples to disturb your reflection. I’ve found that even a light breeze can turn glass into texture, so patience pays off here.
Position yourself low, almost at water level, to maximize the reflection’s impact in your frame. Crouch down or find a dock that gets you close to the surface. The key is capturing equal parts sky and reflection—think of splitting your screen right down the middle. Your phone’s grid feature (usually found in settings) helps nail this composition perfectly.
Scout locations the day before if possible. Look for spots with interesting foreground elements like rocks or fallen logs that’ll appear in both the actual scene and its reflection. And here’s an insider tip: slightly overcast days can work beautifully too, creating soft, even lighting that reduces harsh contrasts your phone might struggle with.
Wildlife from a Safe Distance
Spotting a deer on the trail or a heron by the water is always magical, but getting too close can stress wildlife and put you at risk. Your phone’s zoom feature becomes your best friend here—use it generously to maintain a respectful distance. While digital zoom can make images grainy, good lighting and steady hands help immensely. Pro tip: hold your phone with both hands, tuck your elbows against your body, or lean against a tree for stability.
Burst mode is absolutely essential for capturing animals in motion. Simply hold down the shutter button and your phone will take multiple rapid-fire shots. You’ll be amazed how one frame captures that perfect wing spread or head turn. Later, review your photos and keep only the sharpest ones.
Remember, if an animal changes its behavior because of you—stopping feeding, moving away, or watching you intently—you’re too close. Back up and zoom in instead. This eco-friendly approach protects Ontario’s incredible wildlife while still getting you those frame-worthy shots to share.
Night Sky and Campfire Shots
Your phone’s night mode is a game-changer for after-dark adventures! Most newer smartphones automatically detect low light and activate this feature, but you can also manually enable it in your camera settings. The magic happens when your phone takes multiple exposures and combines them into one stunning image.
For starry skies, find a spot away from your campfire’s glow. Prop your phone against a rock or tree using a small travel tripod (or even a rolled-up sweater works!). Set a 2-second timer to avoid camera shake when you tap the screen. Ontario’s best dark sky parks offer breathtaking Milky Way views that your phone can actually capture—give it 10-30 seconds to work its computational magic.
For campfire shots, embrace the warm glow! Position yourself so the fire illuminates faces naturally, and let night mode balance the darkness behind. The contrast creates wonderfully cozy, memorable images that transport you right back to those s’mores-filled evenings.
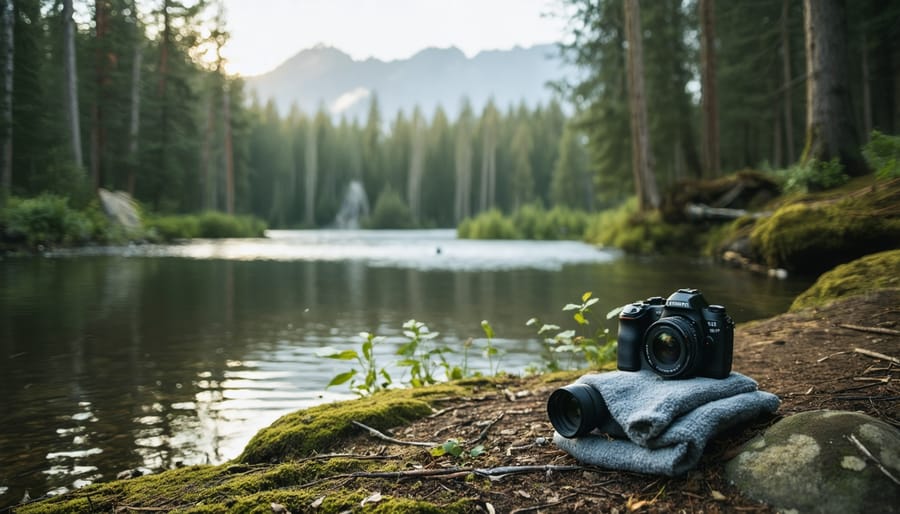
Essential Phone Photography Accessories for Park Adventures
Let’s be honest—you don’t need a backpack full of gadgets to take stunning park photos with your phone. After years of exploring Ontario’s trails, I’ve learned that less is genuinely more when you’re hiking to that perfect waterfall shot.
**The Actually Essential Accessories**
A portable tripod is your secret weapon for those misty morning shots at Algonquin or golden hour captures at Sandbanks. Look for a lightweight aluminum or sustainably-sourced wood option (under 200 grams) that fits in your jacket pocket. I particularly love models with flexible legs that wrap around tree branches—they’re perfect for Ontario’s forested trails and way more eco-friendly than damaging bark by propping your phone against trees.
A simple lens cleaning cloth is non-negotiable. I keep a microfiber one made from recycled materials clipped to my bag’s strap. Trust me, one unexpected sneeze near those thundering Niagara mists, and you’ll understand why this matters more than any fancy lens attachment.
**Skip the Marketing Hype**
Those clip-on lens kits? Save your money. Modern phone cameras already have excellent wide-angle capabilities, and cheap add-on lenses often reduce image quality rather than enhance it. Same goes for battery cases—a slim, durable power bank works better and costs half as much.
**The Real Game-Changer**
Invest in a weatherproof phone case with a wrist strap. I’ve seen too many phones take fatal tumbles on rocky Niagara Escarpment trails. Choose cases made by companies with take-back recycling programs—protecting your phone shouldn’t mean harming the parks you’re photographing.
Editing Magic: Simple Apps That Make Your Photos Pop
You’ve captured that perfect sunrise over Lake Superior, but it looks a bit flat on your phone screen. Don’t worry—a few quick tweaks can transform it from “nice” to “wow,” and you don’t need to be a tech wizard to make it happen.
**Snapseed** is my go-to editing app because it’s completely free and surprisingly powerful. Last summer at Algonquin Park, I used it to rescue a foggy morning shot of a moose that initially looked way too dark. The “Tune Image” tool let me brighten the shadows just enough to reveal those magnificent antlers without washing out the atmospheric mist. The best part? You can edit right from your tent using downloaded photos, no cell service required.
**Lightroom Mobile** offers incredible control with its selective editing features. I once photographed the fall colours at Killarney Provincial Park, but the brilliant red maples were competing with a washed-out sky. Using the gradient filter, I darkened just the sky portion, making those autumn colours absolutely sing. The app saves your edits as “presets,” so you can apply the same adjustments to similar photos with one tap—perfect when you’ve taken dozens of sunrise shots.
For quick fixes, **VSCO** provides natural-looking filters that enhance without screaming “filtered!” Their “A6” preset works beautifully for overcast days at Bruce Peninsula, adding warmth and contrast to grey limestone cliffs.
**Insider tip**: Always edit with a light touch. Boost your exposure and contrast slightly, adjust the shadows to reveal hidden details in darker areas, and increase saturation by just 10-15%. Your Ontario park photos should look enhanced, not artificial.
Before sharing, compare your edited version with the original by toggling back and forth. If you can’t immediately tell what changed but the photo looks noticeably better, you’ve nailed it. Save both versions—you’ll appreciate having the original for future experimentation.
Leave No Trace: Eco-Friendly Photography Practices
Your cellphone is powerful enough to capture stunning park moments, but great photography means leaving nature exactly as you found it. Here’s how to get those frame-worthy shots while protecting the landscapes you love.
**Stay on designated trails**—even when that perfect wildflower patch beckons from just a few steps away. Trampling vegetation damages ecosystems that take years to recover, and honestly? You can capture amazing close-ups by zooming in from the path. Ontario’s parks have thoughtfully placed viewpoints and trails specifically to showcase the best scenery without compromising sensitive areas.
**Give wildlife plenty of space**. That adorable chipmunk or majestic heron doesn’t need you within arm’s reach. Use your phone’s zoom feature (digital zoom works fine for social media posts), and remember: if an animal changes its behavior because of you, you’re too close. I’ve gotten my best wildlife shots by sitting quietly and letting curious creatures come closer on their own terms.
**Avoid disturbing natural features** for the sake of a shot. Moving rocks, breaking branches, or rearranging pinecones might seem harmless, but these actions disrupt habitats and detract from other visitors’ experiences. The beauty of nature photography lies in capturing authentic moments, not staged scenes.
**Drones require special consideration**. Many Ontario parks prohibit drone usage to protect wildlife and preserve the peaceful experience for others. Always check park regulations before flying, and follow responsible park photography practices.
Your photographs can inspire others to protect these incredible spaces—lead by example.
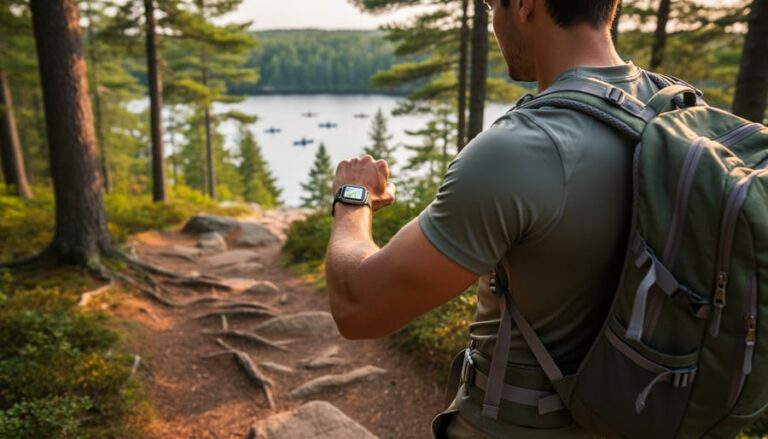
Insider Secrets from Ontario Park Regulars
I’ve spent countless mornings chatting with park regulars while they set up their shots, and their wisdom is pure gold. Take it from Sarah, a retired teacher who visits Algonquin every weekend: “Most people rush to the lookouts right after breakfast, but the real magic happens during the ‘golden hour’ just after sunrise when you’ve got the trails practically to yourself.”
Here’s what the insiders know: arrive at popular spots like Killarney’s The Crack an hour before sunset instead of midday. You’ll dodge the selfie-stick crowds and catch that dreamy light that makes your phone camera look professional. Park interpreter James from Bruce Peninsula suggests exploring hidden photography spots along connector trails—those less-traveled paths linking main routes often hide stunning viewpoints without the tourist buses.
Seasonal insider tips? October weekdays beat weekends for fall colours by a landslide. Spring means muddy trails but also mirror-like puddles that create incredible reflection shots. Linda, a Frontenac regular, swears by visiting wetlands during spring migration—”The frogs and birds don’t care about your fancy camera, just stay still with your phone ready.”
Pro move from park staff: ask at visitor centers about recent wildlife sightings or which wildflowers are blooming. They’ll often share locations that aren’t crowded yet. And here’s my favourite eco-friendly tip from a park warden: download offline maps before you arrive so you’re not draining your battery searching for signal while trampling sensitive areas looking for that perfect shot. These locals have figured out that patience and timing beat expensive equipment every time.
Here’s the truth: you don’t need a fancy camera to capture the magic of Ontario’s parks. That device in your pocket right now? It’s more than capable of freezing those golden-hour sunsets over Lake Superior, the playful chipmunks at your campsite, or the misty morning trails that take your breath away. You’ve got everything you need to document incredible memories and share them with the world.
Every technique we’ve covered—from the rule of thirds to playing with natural light—becomes second nature with practice. The more you explore Ontario’s 340+ provincial parks and protected areas, the more confident you’ll become behind that smartphone lens. You’ll start noticing compositions everywhere, anticipating perfect lighting moments, and capturing shots that make your friends ask, “You took that with your phone?”
But here’s my favourite insider tip: before you reach for your camera, take a moment to simply *be* there. Feel the breeze, listen to the lapping waves, breathe in that pine-scented air. Let your eyes soak it in first. The photos will still be there waiting, and they’ll be better for it—infused with the genuine emotion of someone who truly experienced the moment.
So what are you waiting for? Your next Ontario park adventure is calling, and your camera is already in your pocket. Get out there and start shooting.


+ There are no comments
Add yours