
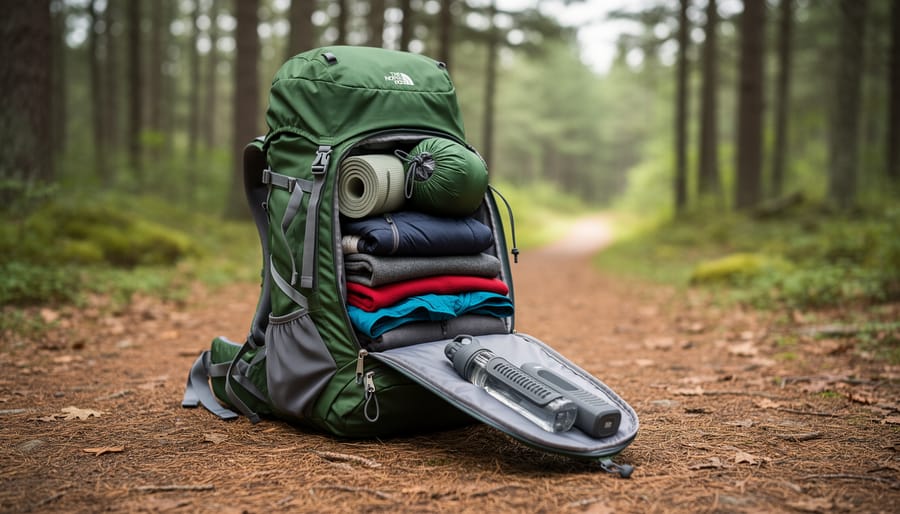
Packing for a five-day backpacking trip means balancing comfort with weight, bringing just enough gear and food to stay safe and well-fed without turning your pack into an anchor. The right packing list for this duration includes a 60-70L backpack, a three-season tent or shelter system, a sleeping bag rated to the expected low temperatures, essential clothing layers, a reliable water filtration system, approximately 2 pounds of food per day, navigation tools, and a well-stocked first aid kit. Most experienced backpackers can pack everything for five days into a base weight of 15-25 pounds before adding food and water.
I’ve learned through countless trips on Ontario’s long-distance backpacking trails that the difference between a miserable slog and an unforgettable adventure often comes down to what you leave behind, not what you bring. Every ounce counts when you’re carrying your entire world on your back for five days. The key is knowing which items earn their place in your pack and which are just dead weight.
This guide walks you through every category of gear you’ll need, from shelter and sleep systems to cooking equipment and clothing layers. You’ll learn how to pack your backpack efficiently so heavy items sit close to your back, how to plan meals that deliver maximum calories with minimum weight, and how to prepare for Ontario’s unpredictable weather patterns. Whether you’re planning a late spring trek through Algonquin or an autumn journey along the Bruce Trail, this comprehensive checklist ensures you’ll have everything you need without carrying anything you don’t.
Essential Gear and Materials for Your 5-Day Pack
Shelter and Sleep System
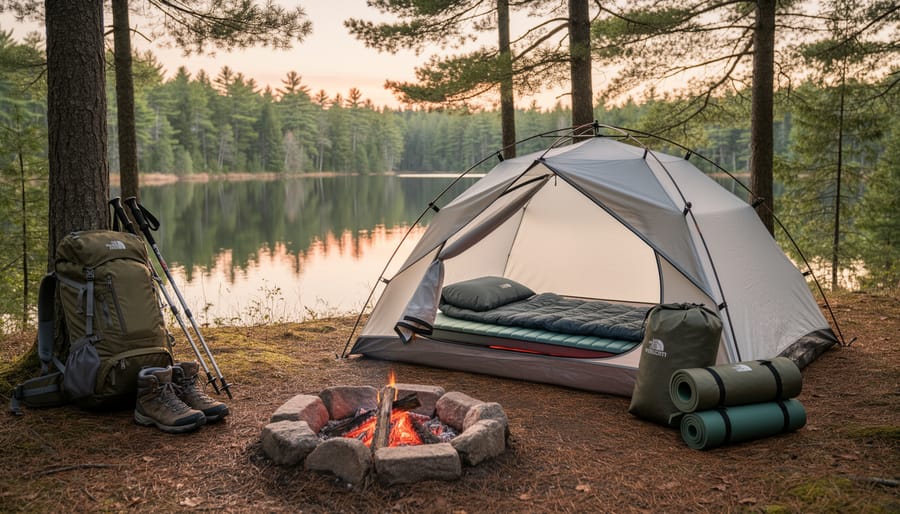
Your shelter and sleep system forms the heaviest part of your pack, so choosing wisely here pays off over five days on the trail. For Ontario’s backcountry, where temperatures can swing from warm afternoons to near-freezing nights even in summer, your sleep setup needs to handle variability without adding unnecessary weight.
Shelter Options
Freestanding tents work best if you’re camping on Ontario’s established backcountry sites with wooden platforms or rocky Canadian Shield terrain where staking is difficult. They stand up on their own, making setup quick after a long day. Non-freestanding shelters like tarps or trekking pole tents shave weight, sometimes a full pound or more, but require softer ground for stakes and guy lines. I learned this the hard way on a windy night in Killarney when my tarp billowed like a sail on a granite slab. For your first 5-day trip, a freestanding tent offers peace of mind and versatility.
Sleep System Essentials
Your sleeping bag should be rated 10-15 degrees Fahrenheit below the coldest temperature you expect. A 20°F bag handles most Ontario three-season conditions, but bring a 10°F bag for spring or fall trips. Down insulation packs smaller and weighs less but loses warmth when wet; synthetic bags cost less and retain some insulation even damp.
- Tent or tarp (2-3 lbs for solo, 3-4 lbs for two-person)
- Sleeping bag rated for expected low temperatures (1.5-3 lbs depending on insulation type)
- Sleeping pad with R-value of 3.5+ for three-season use (12-20 oz)
- Ground sheet or footprint to protect tent floor (4-8 oz, optional but recommended)
- Inflatable or compressible camp pillow (2-4 oz, luxury item but worth it for neck comfort)
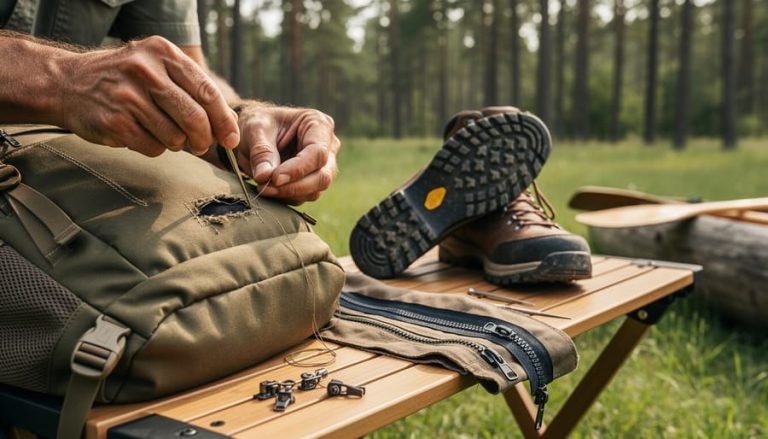
Your sleeping pad matters more than you’d think. The R-value measures insulation, anything below 3.0 leaves you cold on cool ground. Foam pads are bombproof but bulky; inflatable pads pack small but can puncture. Carry a patch kit regardless.
Backpack and Organization
Picking the right backpack transforms your 5-day trip from a struggle to a comfortable adventure. For most hikers carrying five days of gear and food, a 50 to 65-litre pack hits the sweet spot. If you’re an ultralight enthusiast who has trimmed your base weight, you might squeeze into a 45-litre pack. Heavier packers or those bringing camera gear often need the full 65 litres.
Proper fit matters more than brand names or fancy features. Your pack’s hipbelt should rest on your hip bones, not your waist, transferring most of the weight off your shoulders. Visit an outfitter for a professional fitting if possible. An ill-fitting pack will punish you by day three, no matter how carefully you’ve packed it.
Organization keeps you sane on the trail. Stuff sacks compress clothing and sleeping bags while colour-coding helps you grab what you need without unpacking everything. Waterproof dry bags protect electronics, spare clothing, and sleeping bags from Ontario’s sudden downpours. I learned this the hard way during a three-day rain event in Killarney.
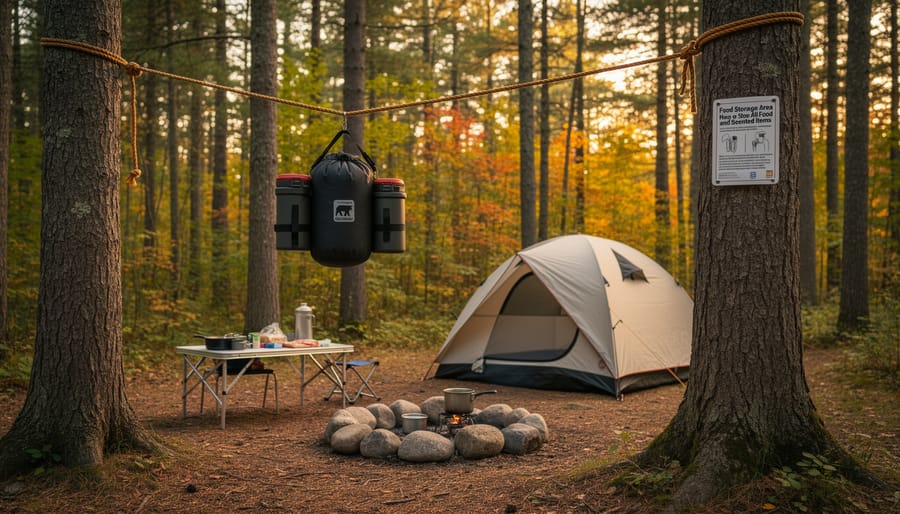
Ontario parks require proper food storage. Algonquin Provincial Park mandates bear-proof canisters or approved hanging systems. The rigid canisters double as camp stools and protect food from raccoons and rodents, not just bears. Check your destination’s specific requirements before you pack.
Consider reusable silicone bags instead of disposable plastic for snacks and leftovers. They weigh almost nothing, reduce trail waste, and last for years of backpacking trips.
Clothing Layering System
The right clothing system keeps you comfortable through Ontario’s unpredictable weather without weighing down your pack. I learned this the hard way on a five-day trek through Killarney when brilliant sunshine on Day 1 gave way to sleet and near-freezing temperatures by Day 3. Since then, I’ve stuck to the layering principle: base layers that wick moisture, insulation that traps warmth, and an outer shell that blocks wind and rain.
Your base layer sits against your skin and should never be cotton. Merino wool or synthetic fabrics pull sweat away from your body and dry quickly, which matters enormously when you’re generating heat climbing elevation or cooling down at camp. For a five-day trip, pack two sets of base layer tops and bottoms so you can rotate while one dries. The same moisture-wicking principle applies to underwear and sports bras. Bring three pairs minimum, though many experienced hikers wash and dry one set every couple of days.
- Base layers: 2 moisture-wicking shirts (synthetic or merino wool), 2 pairs base layer bottoms, 3-4 pairs underwear
- Mid layers: 1 insulated jacket (synthetic or down), 1 fleece or lightweight puffy for evenings
- Outer layer: 1 waterproof rain jacket with hood, 1 pair rain pants
- Hiking clothes: 1-2 pairs quick-dry hiking pants or shorts, 1 pair camp pants (lightweight)
- Extremities: 4-5 pairs wool or synthetic hiking socks, 1 warm hat, 1 sun hat or cap, 1 pair lightweight gloves, 1 buff or neck gaiter
Your insulation layer traps body heat during rest breaks and chilly mornings. A lightweight down or synthetic puffy jacket packs small and provides warmth without bulk. Rain gear is non-negotiable in Ontario, where afternoon thunderstorms appear from nowhere. Choose a waterproof jacket with pit zips for ventilation and rain pants that fit over your hiking boots.
Socks deserve special attention because blisters can end your trip. Bring one extra pair beyond what you think you need, and choose merino wool or synthetic blends that cushion your feet and dry overnight. A warm hat and gloves handle those surprisingly cold June nights in Algononquin’s interior, and a sun hat protects you during exposed ridge walks on the Bruce Trail. This system weighs roughly four to six pounds total and covers every condition Ontario throws at you.
Cooking and Water Systems
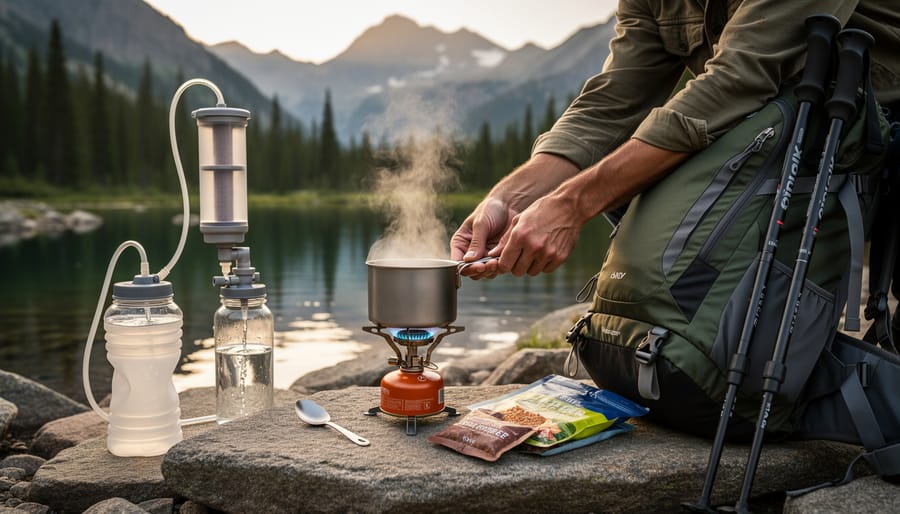
Your cooking and water systems need to deliver 10-15 meals on the trail while keeping weight reasonable and meeting Ontario’s backcountry regulations.
Stove choices break down into three main types. Canister stoves are the most popular for their reliability and precise flame control, burning isobutane-propane mix. For a 5-day trip, plan on one 230g canister, maybe two if you’re cooking elaborate meals or melting snow. Alcohol stoves weigh almost nothing and use denatured alcohol or methanol, but they’re slower and burn roughly 30ml per meal. Wood-burning stoves let you skip carrying fuel entirely, though many Ontario parks prohibit ground fires and restrict stove types during dry periods, so verify regulations before your trip.
Cookware can be minimal. A 900ml-1.2L pot handles meals for one person, while two people might share a 1.5L pot. Bring a long-handled spoon, and skip the full utensil set. A small sponge or bandana cleans dishes, and biodegradable soap (used 200 feet from water sources) prevents grease buildup.
Water treatment is non-negotiable on Ontario trails. Pump filters remove protozoa and bacteria quickly. Chemical tablets like Aquatabs work overnight. UV purifiers (SteriPEN-style) kill pathogens in seconds but need battery power. Carry two methods as backup. Most established Ontario trails cross streams and lakes regularly, the Bruce Trail and Algonquin’s routes rarely require carrying more than two liters between sources. Always treat water even from pristine-looking sources, and never wash dishes directly in lakes or streams.
Navigation and Safety Tools
Getting lost or injured in Ontario’s backcountry is no joke, especially when you’re several days from a trailhead. Navigation and safety tools aren’t optional extras, they’re your lifeline when things go sideways.
Start with paper maps. Yes, even in 2026. Grab topographic maps covering your entire route and trail-specific maps from Ontario Parks for areas like Killarney or Algonquin. A baseplate compass that you actually know how to use complements these perfectly. I learned this the hard way on Day 4 of a Bruce Trail section hike when my phone died and fog rolled in thick enough to cut with a knife.
GPS devices and smartphones loaded with offline maps (apps like Gaia GPS or AllTrails work great) add a modern safety layer, but treat them as backups to your paper system. Download the maps before you leave cell service, and carry a portable battery pack.
Your first aid kit needs more than band-aids for five days out. Include blister treatment (moleskin and tape), pain relievers, antihistamines, anti-diarrheal medication, gauze, medical tape, tweezers, and any personal prescriptions. Add a small emergency guide if you’re not trained in wilderness first aid.
Pack these additional safety essentials:
- Emergency whistle, three blasts is the universal distress signal
- Headlamp with fresh batteries plus one spare set, you’ll need hands-free light for cooking and navigating after dark
- Multi-tool or fixed-blade knife, gear repairs, food prep, and emergency use
- Fire starter (waterproof matches, lighter, ferro rod), critical if you need to stay warm in an emergency
- Emergency shelter like a bivy sack or space blanket, backup if your tent fails or you can’t reach camp
Before you hit the trail, secure any required permits. Ontario Parks backcountry sites need advance reservations, and some areas have specific regulations about group sizes or designated campsites. Check the park website and print your permit confirmation, rangers do verify them on popular routes.
Food Planning and Packing for Five Days
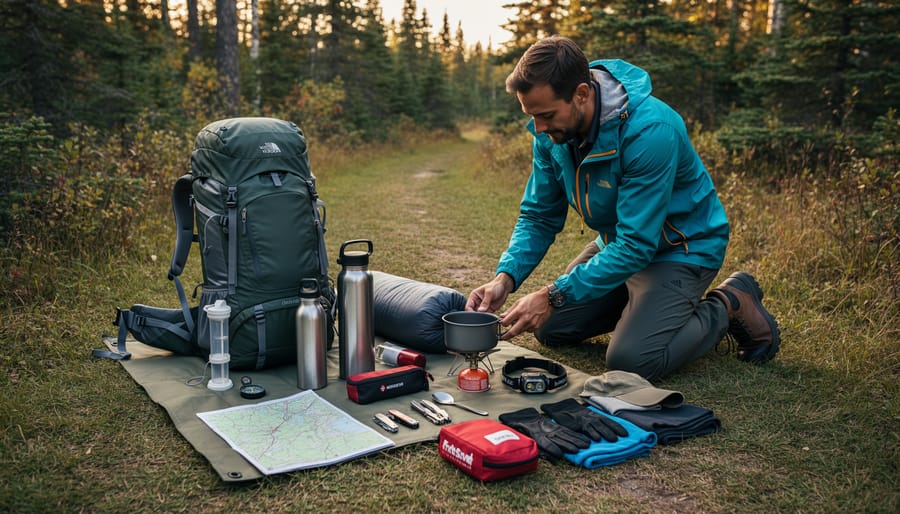
On a 5-day backpacking trip, you’ll burn between 2,500 and 4,000 calories daily depending on terrain, pack weight, and your pace. Planning around 3,000 calories per day is a safe middle ground for most hikers tackling Ontario’s backcountry routes. That translates to roughly 1.5 to 2 pounds of food per day, meaning you’ll carry 7.5 to 10 pounds of food for the entire trip.
Your meal planning should prioritize calorie density, preparation ease, and foods you actually enjoy eating. After three days on the trail, bland oatmeal gets old fast. For breakfast, instant oatmeal with dried fruit and nuts provides quick energy, but consider adding powdered milk or protein powder for staying power. Lunch works best as a no-cook affair since you’re likely on the move: tortillas with peanut butter and honey, hard cheese, summer sausage, and trail mix keep you fueled without firing up your stove. Dinner is where you can get creative with dehydrated meals, instant rice or couscous mixed with tuna packets or dehydrated vegetables, and instant mashed potatoes bulked up with olive oil for calories.
Snacks matter more than you’d think. Pack calorie-dense options like nuts, dried fruit, energy bars, jerky, and chocolate. I learned on a Killarney trip that having something tasty to look forward to at each break keeps morale high when your legs are tired.
Food storage in Ontario parks typically requires bear-proof canisters or proper hanging techniques using the rope method. Algonquin and many provincial parks mandate approved storage, so check regulations before you go. Pack aromatic items like coffee and toothpaste with your food. Use doubled freezer bags to organize meals by day, which simplifies finding what you need and helps track your supply. This system also lets you burn or pack out progressively less trash as the trip continues, lightening your load each day.
Safety Warnings and Trip Preparation
Before you shoulder your pack and step onto the trail, take the time to address critical safety considerations that can make or break your five-day adventure. Weather in Ontario shifts quickly, especially in spring and fall, so check detailed forecasts for your entire route and have a backup plan if conditions deteriorate. Always file a trip plan with the park office or leave detailed information with a trusted friend, include your intended route, campsites, vehicle location, and expected return date. This simple step has saved lives when hikers go missing or get injured.
Wildlife awareness extends beyond bears. Moose are common on many Ontario backcountry routes and can be aggressive, particularly cows with calves in spring or bulls during autumn rut. Give them wide berth and never approach for photos. Water quality varies, even clear streams can harbor giardia or other pathogens, so treat every water source.
Seasonal hazards demand respect. Spring melt brings swollen streams that can turn crossings dangerous and flood low-lying campsites. Autumn temperatures plunge after sunset, and hypothermia becomes a real risk if you’re caught unprepared. If severe weather threatens, trail conditions worsen beyond your skill level, or you simply don’t feel ready, postpone the trip. The wilderness will be there when you’re properly prepared, and there’s no shame in prioritizing safety over ambition.
Step-by-Step Packing Process
Organize Before You Pack
Before you start stuffing items into your backpack, spread everything out on your floor or a large table. This visual inventory prevents forgotten items and helps you see what you’re actually carrying.
Start by organizing gear into piles: shelter system, sleep system, cooking setup, clothing, food, water treatment, navigation tools, and first aid. Check each pile against your packing list, crossing items off as you go. It sounds tedious, but I learned this lesson after forgetting my stove fuel on day two of a Killarney trip, not fun.
If you’re working toward a specific base weight goal, now’s the time to weigh each category using a kitchen scale. You’ll quickly identify heavy items that might have lighter alternatives for future trips. A digital luggage scale works great for checking your loaded pack’s total weight before you leave.
Group items by how often you’ll need them. Rain gear, snacks, and your map should stay accessible. Your sleeping bag and camp shoes can go deep in the pack since you won’t touch them until evening. This simple organization step saves you from unpacking everything just to find your headlamp at dusk.
Loading Your Pack Strategically
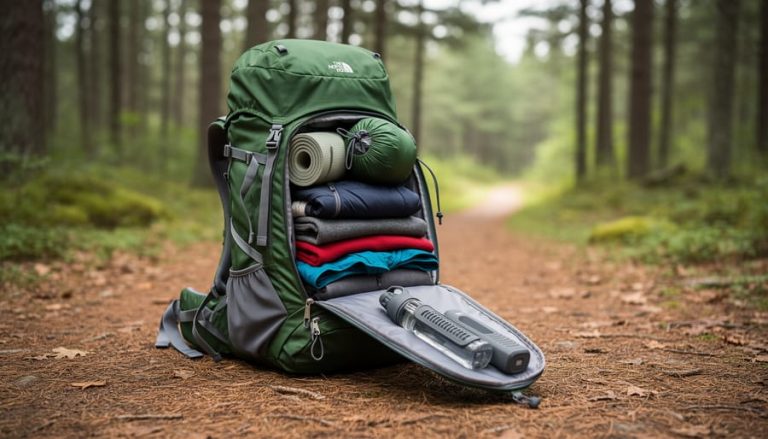
Start with your sleeping bag stuffed into the bottom compartment. This keeps the lightest, bulkiest item low and creates a cushion for the pack’s base. Tuck your clean camp clothes, like a spare shirt and socks, into any remaining space down there.
Next, load the main compartment. Your heaviest items, the bulk of your food, full water bottles, stove, and fuel, should sit vertically against your back panel, positioned roughly between your shoulder blades and lower back. This placement keeps the weight close to your center of gravity, preventing the pack from pulling you backward. I learned this the hard way on Day 2 of a Killarney trip when I’d buried my food bag at the bottom; by mid-afternoon, my lower back was screaming.
Place medium-weight items like your tent body, extra clothing layers, and cook pot around and on top of the heavy core. Fill gaps with smaller stuff, fuel canisters wedged beside water bottles, socks tucked into your pot. A well-packed main compartment shouldn’t shift or rattle when you shake it.
Reserve the top compartment and outer pockets for gear you’ll grab repeatedly. Rain jacket goes in the top lid or an easily accessed pocket, not buried. Keep your trail map, snacks, sunscreen, and bug spray where you can reach them without stopping to dig. Water bottle side pockets are obvious, but also stash your headlamp there as afternoon wears on. On Ontario’s long summer days, you might not need it until 8:30 PM, but better within reach than packed away.
Final Adjustments and Fitting
Once your pack is loaded, cinch the hip belt first, it should sit on your hip bones, not your waist, carrying 80% of the weight. Tighten shoulder straps until snug but not digging in. Pull load lifters (the small straps above your shoulders) at a 45-degree angle to bring the pack closer to your back.
Walk around your home with the full weight for 15 minutes. You’ll quickly notice pressure points or imbalance that need adjustment. I learned this lesson the hard way on day three of a Killarney loop when persistent shoulder pain revealed I’d been relying too heavily on my straps instead of my hips. After redistributing weight and properly adjusting my hip belt at camp, the final two days felt completely different, like carrying half the load.
Take time for this fitting process. Your back will thank you when you’re five kilometres into day one.
Pre-Trip Verification and What to Do Next
You’ve done the hard work of selecting and packing your gear. Now it’s time for the final verification that separates a smooth adventure from a stressful scramble at the trailhead. This last check ensures you haven’t overlooked critical logistics or left essential items on your kitchen counter.
Start with a thorough systems check to verify nothing essential is missing. Walk through each core system: shelter (tent, stakes, guylines), sleep (bag, pad, pillow if you’re bringing one), cook (stove, fuel, pot, lighter), navigate (map, compass, GPS or phone with downloaded offline maps), and safety (first aid kit, headlamp, emergency whistle, fire starter). This framework catches gaps that a simple packing list might miss. If any system is incomplete, you’ll notice it before you’re hours down the trail.
Next, confirm your administrative details and logistics are sorted:
- Backcountry permits secured and printed or saved to your phone
- Weather forecast checked for the entire trip duration, with gear adjusted for predicted conditions
- Emergency contacts informed of your route, expected return date, and when to call for help if you don’t check in
- Vehicle parking confirmed, including overnight fees paid if required by the park
- Trip plan filed with the park office if they offer that service
If this is your first multi-day trip or you’re testing new gear, consider a shake-down hike. Take your fully loaded pack on a short overnight trip to a nearby backcountry site. This reveals uncomfortable pressure points, missing items, and overpacking before you’re committed to five days. Ontario’s parks like Frontenac and Silent Lake offer accessible backcountry loops perfect for testing your setup, and you can plan your Ontario trip to build confidence before tackling longer sections of the Bruce Trail or deeper wilderness routes.
With everything verified, you’re ready. Trust your preparation, embrace the adventure ahead, and enjoy the incredible backcountry Ontario has to offer.
Frequently Asked Questions
How heavy should my fully loaded pack be for a 5-day trip?
A realistic total weight for most backpackers is 30-40 pounds, including food and water. Ultralight hikers can get below 25 pounds, while those carrying extra comfort items or photography gear might reach 45 pounds. If you’re new to multi-day trips, aim for the lower end and gradually add items as you learn what you actually need versus what stays untouched in your pack.
What should I do if it rains for multiple consecutive days?
Keep a dedicated dry bag for your sleep system and spare clothes, these are non-negotiable. Change into dry camp clothes at the end of each wet hiking day, and accept that your hiking clothes will stay damp. Most Ontario backcountry shelters have covered areas where you can cook and wait out heavy downpours, and carrying a lightweight tarp provides extra protection for gear organization at camp.
How do I properly deal with trash during a 5-day backcountry trip?
Pack out everything you pack in, use a dedicated trash bag inside your food bag or a zippered pocket. Burn packaging before your trip to reduce volume, choose meals with minimal waste, and never bury food scraps or toilet paper in Ontario’s fragile ecosystems. Many experienced hikers double-bag used toilet paper separately and pack it out in sealed bags.
Can I resupply food or water during a typical 5-day Ontario backpacking route?
Most 5-day routes in Algonquin, Killarney, or along the Bruce Trail don’t offer resupply points, so plan to carry everything from the start. Some loops cross roads where you could cache supplies beforehand or arrange a support person to meet you, but this requires advance planning and isn’t reliable. Water is abundant at lakes, rivers, and streams throughout Ontario’s parks, so you only need to carry 1-2 liters between sources and treat as you go.
Do I really need hiking boots, or can I use trail runners for a 5-day trip?
Modern trail runners work brilliantly for many backpackers, especially on well-maintained routes like the Fullerton Loop itinerary because they’re lighter, dry faster, and cause fewer blisters than traditional boots. Boots make sense if you have weak ankles, carry a particularly heavy load, or hike mostly off-trail on rocky Canadian Shield terrain. Whatever you choose, make sure it’s broken in well before your trip, blisters on Day 2 can ruin the entire experience.
The principles that work for backpacking apply to other long-distance adventures too. If you’re considering bike-based trips, the rail trail packing tips follow similar logic about weight distribution and essential gear, just adapted for pedaling instead of hiking.
One last reassurance: you won’t get everything perfect on your first 5-day trip, and that’s completely normal. Every experienced backpacker has a story about carrying too much of something or forgetting a small item that would’ve made life easier. The learning process is part of the adventure, and Ontario’s accessible backcountry gives you plenty of opportunities to refine your system on future trips.
With your pack loaded, your gear organized, and your checklist completed, you’re ready to experience the incredible backcountry that Ontario has to offer. The difference between a trip you’ll remember fondly and one you’ll want to forget often comes down to what you brought and how well you packed it.
I’ve learned through plenty of trial and error that preparation doesn’t take the adventure out of backpacking, it creates space for the adventure to happen. When you’re not worried about a forgotten headlamp or struggling with a poorly balanced pack, you can actually enjoy the sunrise over a mist-covered lake or the satisfaction of reaching a remote campsite after a challenging day on the trail.
Remember that Leave No Trace principles protect these wild spaces for everyone who follows. Pack out everything you pack in, respect wildlife, and leave campsites better than you found them. Ontario’s backcountry is a treasure that requires all of us to be responsible stewards.
Whether you’re planning your first five-day trip on a section of the Bruce Trail, heading into Algonquin’s interior, or exploring the rugged coastlines of Lake Superior Provincial Park, you now have the knowledge to pack smart and hike confident. Ontario’s diverse trail systems are waiting, get out there and make some memories.

+ There are no comments
Add yours