
Open Google Earth on your computer or phone and type in the name of any Ontario provincial park you’re planning to visit. Switch to the satellite view and zoom down until you can see individual trees, shorelines, and trail networks with stunning clarity. This is Google aerial mapping at work, and it’s about to become your most valuable trip-planning companion.
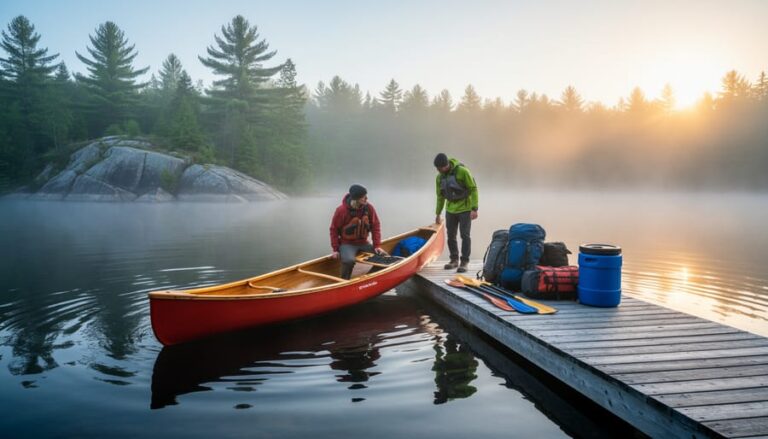
I discovered this game-changing tool three years ago while planning a canoe route through Algonquin Park. Instead of guessing what waited around the next portage, I could see exactly where campsites sat, how dense the forest cover was, and which bays offered the best shelter from wind. That trip went from stressful guesswork to confident exploration, and I’ve never planned an outdoor adventure the same way since.
Google’s aerial mapping technology uses satellite imagery and aircraft-mounted cameras to capture incredibly detailed overhead views of virtually every corner of Ontario’s wilderness. You’re not just looking at a basic map anymore. You can measure distances between trailheads, scout for hidden swimming holes, identify potential wildlife viewing spots, and even check how crowded parking areas might be before you leave home.
Whether you’re a seasoned backcountry navigator or planning your first camping trip, this free technology puts professional-grade planning tools in your pocket. The best part? You don’t need any technical expertise to use it effectively for your next Ontario adventure.
What Google Aerial Mapping Really Shows You
Google aerial mapping is essentially a bird’s-eye view of the world, captured through a combination of satellite imagery and aerial photography taken from aircraft. When you zoom into Ontario’s parks on Google Maps or Google Earth, you’re looking at incredibly detailed photographs stitched together to create seamless, overhead views of forests, lakes, trails, and terrain.
The technology works by capturing images from different angles and altitudes. Satellites orbiting Earth provide broader coverage, while planes equipped with specialized cameras fly lower to capture those crisp, close-up shots where you can actually spot picnic tables, boardwalks, and even individual trees. Google processes millions of these images using sophisticated software that corrects for lighting, removes clouds, and creates those smooth transitions as you zoom in and out.
For adventurers planning trips to Ontario’s parks, the level of detail is genuinely impressive. You can make out hiking trail routes winding through forests, identify whether a lake has sandy beaches or rocky shores, and even spot parking areas and facilities. The 3D terrain feature lets you visualize elevation changes, helping you gauge whether that trail is going to be a gentle walk or a challenging climb.
I’ll never forget the moment I discovered a hidden waterfall while planning a trip to Algonquin Park. I was casually scrolling through the aerial view, following a small creek upstream, when I noticed what looked like a white streak interrupting the tree canopy. Sure enough, when I hiked there the following week, I found a gorgeous little cascade that wasn’t marked on any official trail map. It became the highlight of my trip, and I would have walked right past it without that aerial preview.
This technology transforms trip planning from guesswork into informed decision-making, giving you the confidence to explore with a clear picture of what awaits.
Planning Your Park Adventure From Above
Scouting Campsites Before You Arrive
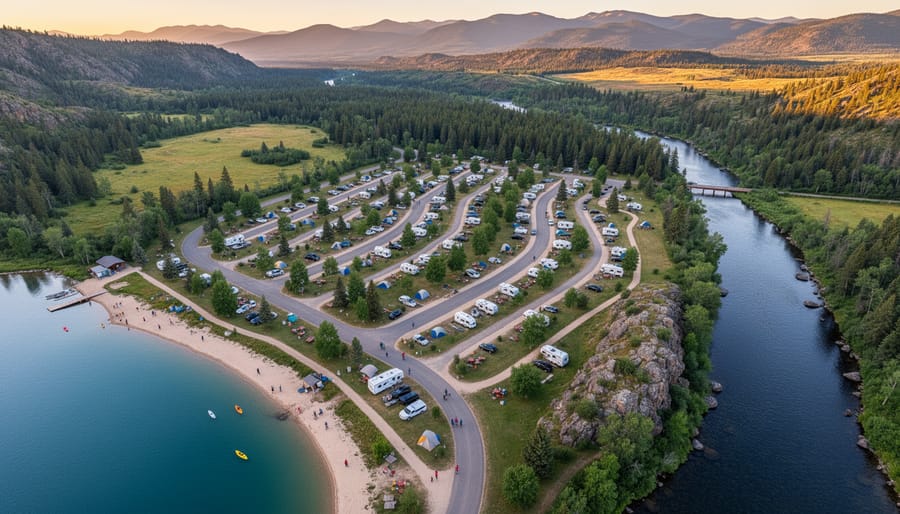
Before you pack the car and head out, spend fifteen minutes exploring your destination from above. Google’s aerial view is like having a friendly park ranger whispering insider secrets about your campsite before you even leave home.
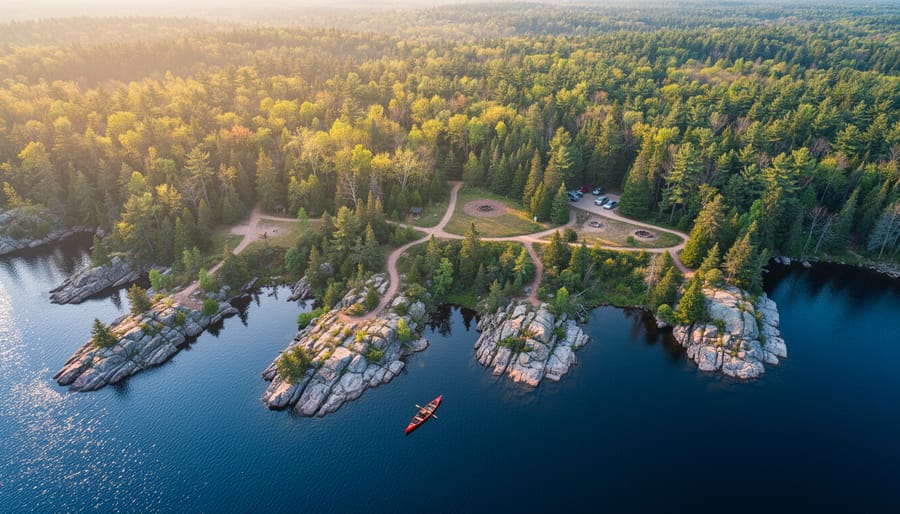
Start by zooming in on the campground itself. Those darker green patches? That’s usually denser tree coverage, perfect for shade on hot summer days. If you’re camping in July or August at places like Algonquin or Killarney, finding a spot with good tree cover can make the difference between a comfortable morning coffee and waking up in a sauna by 7 AM.
Next, look for those telltale blue ribbons winding through the landscape. Water sources are crucial, whether you need to fill your bottles, take a quick dip, or enjoy waterfront views. Zoom in close enough and you can often spot the shoreline features – sandy beaches appear lighter, while rocky outcrops show up darker and more textured.
Here’s an insider tip: check the campsite’s orientation using the compass feature. Sites facing east get gorgeous sunrise views but also early morning heat. West-facing spots? You’ll enjoy those spectacular sunsets but might deal with afternoon sun beating on your tent.
Want to avoid the crowds? Scout the access roads and parking areas. Campsites further from the main entrance or requiring a short walk typically see fewer visitors. Look for those quieter loops tucked away from central facilities – your ears will thank you when you’re not camping beside the bathroom traffic at 2 AM.
Finding Hidden Trails and Access Points
Google’s aerial view becomes your treasure map when you know what to look for. I discovered this firsthand while exploring Frontenac Provincial Park, where some of the best swimming spots and quiet campsites aren’t marked on official trail maps.
Start by zooming in close on parking areas and look for thin, lighter-colored lines snaking into the forest. These often indicate social trails or unmarked paths that locals use. In the satellite view, you’ll notice these trails have slightly different vegetation patterns—they’re usually a shade paler than the surrounding forest canopy.
Pay special attention to road shoulders and pull-offs near park boundaries. At Frontenac, I spotted a small gravel area off Bedford Road that wasn’t listed as official parking. Street view confirmed it was legitimate, and it gave me access to a gorgeous section of the Slide Lake Loop without the crowds at the main trailhead.
Water access points are another hidden gem. Look for breaks in the treeline along shorelines or small clearings near water—these often mark canoe launches or fishing spots. The key is switching between map view and satellite view repeatedly; what looks like dense forest in one perspective might reveal a clearing in another.
Similar to geocaching adventures, finding these secret spots adds an element of discovery to your outdoor experience. Just remember to respect private property boundaries and follow Leave No Trace principles when exploring these lesser-known areas.
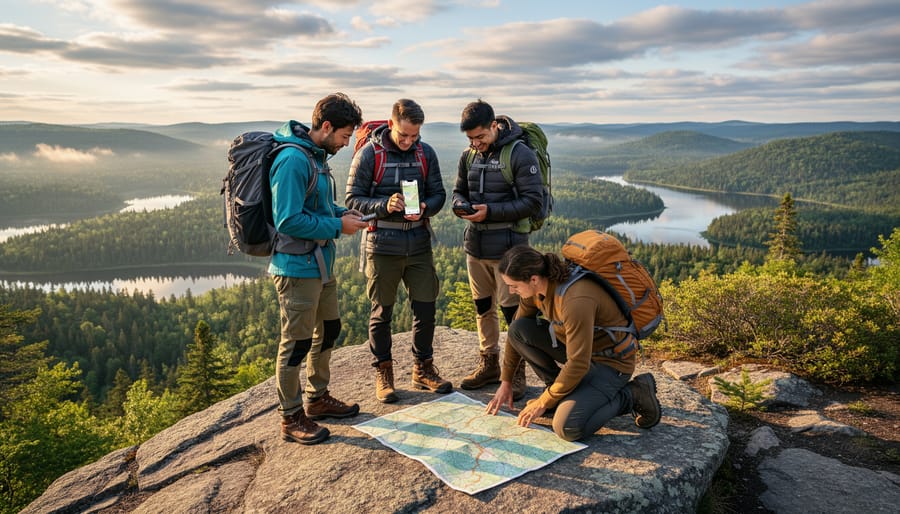
Gauging Distance and Difficulty
Before my family attempted our first backcountry hike in Frontenac Provincial Park, I made a rookie mistake: I picked a trail that looked “short” on the map. Two hours later, with tired kids and dwindling water supplies, I learned that distance alone doesn’t tell the whole story. Google’s aerial mapping tools can help you avoid this scenario by revealing the full picture of what you’re getting into.
The measurement tool is your best friend here. Simply right-click on your starting point, select “Measure distance,” and click along your intended route. You’ll see the total distance displayed at the bottom. But here’s where it gets really useful: look at the terrain’s color gradients. Darker greens often indicate valleys, while lighter browns suggest ridges and elevation changes. This visual cue helps you anticipate those leg-burning climbs.
For families and beginners, I recommend pairing distance measurements with Street View exploration. Drop the little yellow person onto trail access points to see parking conditions and trailhead markers. This preview can reveal muddy approaches or steep initial climbs that might challenge young hikers.
Here’s an insider tip: zoom in close and look for switchbacks—those zigzagging trail patterns. More switchbacks usually mean gentler grades, making them ideal for families. Straight lines heading up hillsides? Those are typically steeper and more demanding.
Combine these mapping insights with your developing wilderness navigation skills, and you’ll make informed decisions about route difficulty. A 5-kilometer trail with minimal elevation change makes for a very different experience than the same distance with constant climbs. Google’s bird’s-eye perspective helps you choose adventures that match your group’s abilities, ensuring everyone finishes with smiles instead of blisters.
Reading Nature’s Story Through Aerial Views
Spotting Seasonal Changes
Here’s a trick most park-goers don’t know about: Google Earth’s time-slider feature lets you travel back through seasons without leaving your couch! Click the clock icon to access historical imagery dating back years, and suddenly you’re watching the seasons unfold like a nature documentary.
I discovered this gem while planning a fall colours trip to Algonquin. By scrolling through October images from previous years, I spotted exactly which weeks the maples peaked in different areas of the park. Game-changer! You can do the same for any Ontario park—just compare images from different months to see when wildflowers bloom, when lakes typically freeze, or when spring runoff creates those dramatic waterfalls.
This feature is particularly handy for avoiding surprises. Last spring, I checked historical April imagery of a riverside trail and noticed consistent flooding patterns. Sure enough, by planning my visit for late May instead, I enjoyed dry paths and calmer waters perfect for kayaking.
Pro tip: Look for the image capture dates in the bottom corner—they tell you exactly when each photo was taken. String together several years of data, and you’ll become a seasonal expert for your favourite spots. It’s like having a crystal ball for trip planning!
Identifying Sensitive Areas to Protect
Before you lace up your hiking boots, spend some time with Google’s aerial mapping tools to identify environmentally sensitive zones that deserve extra care. I learned this lesson the hard way after accidentally tramping through a vernal pool habitat—those seasonal wetlands are breeding grounds for salamanders and frogs, and they’re not always obvious from ground level!
Aerial imagery helps you spot wetlands by their distinctive dark patches, irregular shapes, and the water-loving vegetation that appears darker green. Look for these areas on your route and plan to give them a wide berth. Nesting sites for ground-dwelling birds often appear as open meadow areas near forest edges—beautiful for viewing from a respectful distance, but definitely off-limits during breeding season from April through July.
Fragile shoreline ecosystems and steep slopes prone to erosion show up clearly in satellite views too. I always check for these vulnerable spots before planning my wildlife spotting adventures. When you identify sensitive areas on the map, mark them with pins or notes so you can adjust your path accordingly.
This planning approach perfectly complements leave no trace principles. By scouting virtually first, you’ll protect delicate habitats while still enjoying incredible outdoor experiences. Plus, knowing which areas to avoid means you can focus your energy on the trails and viewpoints where your presence won’t disturb critical ecosystems.

Tools and Tips for Your Aerial Scouting Session
Best Features for Outdoor Enthusiasts
Google Maps offers several powerful features that transform how you scout trails and plan adventures in Ontario’s wilderness. Think of these tools as your digital navigation tools that work before you even lace up your hiking boots.
Start with Terrain View to see topographical details. On desktop, click the layers icon in the bottom-left corner and select “Terrain.” On mobile, tap the layers button and choose the same option. This reveals elevation changes, helping you gauge trail difficulty before committing to that ambitious day hike in Algonquin Park.
Next, try 3D Mode for a bird’s-eye perspective of your destination. On desktop, hold Ctrl (or Cmd on Mac) and drag your mouse. Mobile users can swipe up with two fingers. I’ve used this countless times to visualize lakeside campsites and assess accessibility to water sources.
Street View integration lets you virtually explore trailheads and parking areas. Simply drop the yellow pegman icon onto blue-highlighted roads to see what facilities await you.
The measurement tool is perfect for calculating distances between campsites or estimating trail lengths. Right-click any point on the map, select “Measure distance,” then click additional points to create your route. This feature has saved me from underestimating hiking times more than once, especially when planning multi-day backcountry trips.
Saving and Sharing Your Discoveries
Once you’ve found those incredible hidden waterfalls or secret swimming spots, you’ll want to save them for future adventures. Google Maps makes this delightfully easy. Simply drop a pin on any location by pressing and holding on the map, then tap “Save” to add it to your custom lists. I like creating themed collections – one for camping spots, another for paddling launches, and yes, a whole list dedicated to the best places I’ve found wild blueberries.
The real magic happens when you’re planning a group trip. You can share entire custom maps with your adventure crew, complete with notes about trail conditions or where to find the best lakeside picnic rocks. Just tap the menu icon, select “Share or embed map,” and send the link. Your friends can then add their own discoveries, turning trip planning into a collaborative treasure hunt.
Here’s an insider tip that’s saved me countless times: download offline maps before heading into Ontario’s remote parks. Cell service can be spotty once you’re deep in the wilderness. Open Google Maps while you still have WiFi, search for your destination area, tap your profile picture, select “Offline maps,” and download the region you need. The aerial imagery comes with it, so you can still navigate even when you’re completely off the grid. I’ve downloaded entire sections of Algonquin and Killarney this way, ensuring I never miss a turnoff to that perfect canoe portage.
Real Adventures: Ontario Parks Through the Aerial Lens
Last summer, my friend Maya was planning a canoe trip to Algonquin Provincial Park and made what she calls “the best mistake ever.” While browsing Google Maps in aerial view, she accidentally clicked too far east of her intended campsite and discovered a hidden chain of three small lakes she’d never seen mentioned in any guidebook. The bird’s-eye perspective revealed a narrow portage connecting them to her planned route. That detour became the highlight of her entire trip, where she spotted a moose family and had those pristine waters completely to herself.
This is the magic of aerial mapping for Ontario park exploration. It transforms planning from guesswork into discovery.
At Killarney Provincial Park, local guide Tom Chen regularly uses aerial imagery to help visitors understand the famous La Cloche Mountains before they arrive. “People see those white quartzite ridges from above and suddenly get why we call this the Crown Jewel of Ontario’s park system,” he explains. The aerial view reveals the dramatic pink granite shores of Georgian Bay and helps hikers choose routes matching their fitness levels. Tom once helped a family with young kids identify a perfect shallow bay for swimming by examining the water color gradients in satellite images, something impossible to gauge from ground-level photos.
Down at Point Pelee National Park, the aerial perspective tells an entirely different story. Bird watchers discovered they could time their visits by studying the seasonal changes visible in overhead imagery. The marsh patterns shift dramatically during spring migration, and comparing aerial views from different months helps serious birders predict where rare species might congregate.
Here’s an insider tip that changed how I explore parks: use the terrain view alongside aerial imagery. At Bon Echo Provincial Park, switching between these views revealed why certain cliff faces catch sunset light perfectly for photography. The topographic lines showed elevation changes I couldn’t grasp from regular photos.
The real adventure begins when you stop thinking of aerial mapping as just a navigation tool and start seeing it as your personal park reconnaissance mission. Those overhead views reveal secret beaches, ideal picnic peninsulas, and quieter trail alternatives that most visitors miss entirely.
Before your next Ontario park adventure, spend fifteen minutes exploring Google’s aerial mapping tools. You’ll be amazed at how this free resource transforms trip planning from guesswork into confident preparation. Zoom in on those hidden trailheads, scope out lakeside camping spots, and mentally rehearse your route before you even pack your backpack.
Here’s the beautiful part: aerial mapping doesn’t replace the magic of spontaneous discovery. Think of it as your digital compass, giving you enough knowledge to explore safely while leaving plenty of room for those unexpected moments that make adventures memorable. You’ll still stumble upon that perfect picnic rock or hidden waterfall, but you’ll reach them without getting hopelessly lost.
Ready to put this tool into action? Browse our comprehensive park guides to find your next destination, then fire up Google Earth to start planning. Your more confident, responsible, and well-prepared adventure awaits. The parks are calling, and now you’ve got the perfect co-pilot to help you answer with enthusiasm and smart preparation.


+ There are no comments
Add yours