

Build a snow shelter within one hour of recognizing you’re stranded – it’s your primary defense against hypothermia and the brutal winter elements. Creating proper insulation between you and the frozen ground immediately improves your chances of survival by maintaining critical body heat. Master these backcountry survival essentials before venturing into Ontario’s wilderness.
Start a fire using dry materials gathered from beneath fallen trees and snow-protected areas, where tinder remains accessible even in harsh conditions. Keep the flame small and controlled, focusing on sustaining it rather than creating a large blaze that wastes precious fuel.
Signal for help using three of anything – whistle blasts, fires, or bright objects arranged in a triangle pattern. This universal distress signal attracts attention while you maintain your shelter and fire. Stay put once you’ve established your survival site – movement in extreme cold quickly depletes energy and increases risk of exposure.
Pack these critical items: a waterproof fire starter, emergency blanket, high-calorie food bars, and a basic first aid kit. When properly prepared, your chances of surviving a winter wilderness emergency increase dramatically. Remember: your survival depends on making smart decisions in the first crucial hours.
Before You Head Out: Essential Winter Preparation
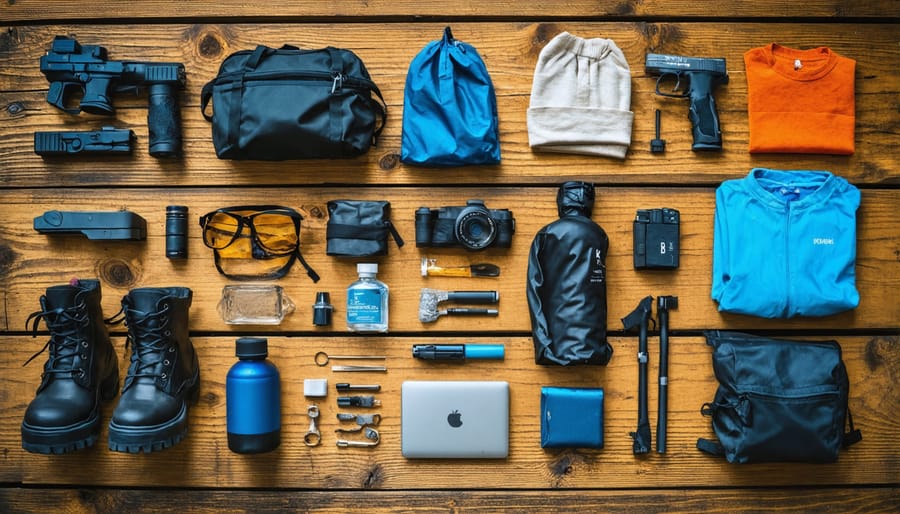
Winter Survival Kit Essentials
When venturing into Ontario’s winter wilderness, having the right essential survival gear can mean the difference between life and death. Here’s what you absolutely need in your winter survival kit:
First up, insulation is crucial. Pack extra wool socks, thermal layers, and emergency blankets. Pro tip: I always bring two pairs of mittens – wet hands can get dangerously cold in minutes! A waterproof fire starter kit is non-negotiable; include waterproof matches, a lighter, and fire starter cubes stored in a sealed container.
For shelter and navigation, carry a compact emergency tent or tarp, paracord, and a reliable compass (don’t just rely on your phone!). A headlamp with extra batteries is essential – winter nights are long in Ontario.
Food and hydration are vital. Pack high-energy snacks like trail mix and protein bars, plus a metal container for melting snow. I learned this the hard way: eating snow directly can lower your body temperature dangerously.
Don’t forget these often-overlooked items:
– Signal whistle (three blasts is the universal distress signal)
– Multi-tool or knife
– First-aid kit with hand warmers
– Reflective emergency blanket
– Snow shovel (collapsible)
– Extra batteries
– Sunglasses (snow blindness is real!)
Remember to check your kit regularly and replace any expired items. The best survival kit is the one you know how to use, so familiarize yourself with each item before heading out.
Dressing for Ontario Winter Success
In Ontario’s harsh winters, proper layering is your first line of defense against the cold. Start with a moisture-wicking base layer made of merino wool or synthetic materials – cotton is a big no-no as it holds moisture and can lead to dangerous chilling. Your middle layer should focus on insulation; fleece or wool sweaters are perfect for trapping warm air close to your body.
For the outer layer, choose a windproof and waterproof jacket and pants that can handle both wet snow and biting winds. Don’t forget about proper snow pants – the kind with reinforced knees and seats are worth their weight in gold when you need to kneel in the snow to build a shelter.
Pay special attention to your extremities. Wear two pairs of socks – a thin moisture-wicking liner and a thicker wool sock over it. Waterproof boots rated for at least -40°C are essential, and make sure they’re roomy enough for toe wiggling. Mittens keep hands warmer than gloves, but pack both. A good hack is to bring hand warmers to slip inside your mittens on particularly cold days.
Your head and neck need serious protection too. A wool toque that covers your ears, a neck gaiter or scarf, and a face mask for extreme conditions will help prevent frostbite. Pro tip: pack extra pairs of everything – getting wet in winter can be life-threatening.
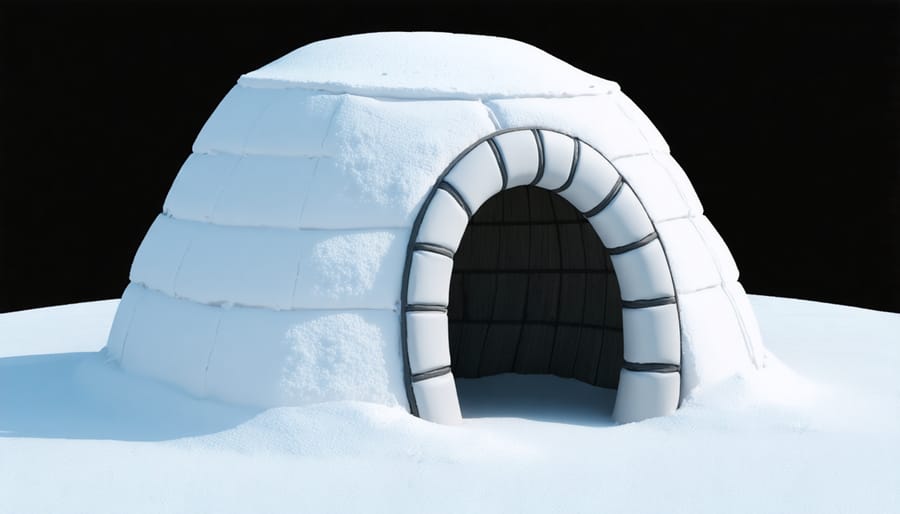
Emergency Shelter Building in Ontario’s Snow
Quick Snow Shelter Techniques
When you need shelter fast in Ontario’s winter wilderness, knowing how to build a quick snow shelter can be a lifesaver. The most basic and fastest option is the snow trench: simply dig a trench in the snow about your body length and width, then cover it with branches and snow for insulation. Remember to keep the entrance small to retain heat.
For a sturdier option, try the classic snow cave. Find a deep snowdrift on the lee side of a hill, and dig horizontally into it. Create a sleeping platform higher than the entrance – this helps trap warm air inside. Make sure to poke a few small ventilation holes in the roof to prevent carbon dioxide buildup.
If you’re in an area with deep, compact snow, the quinzee is your best bet. Start by piling snow into a dome about 6 feet high and 8 feet wide. Let it settle for about an hour (this is crucial for structural integrity), then dig out the inside, leaving the walls about 1 foot thick. Poke several small sticks through the walls before digging – when you reach the ends while hollowing out the inside, you’ll know your walls are the right thickness.
Pro tip: Always keep your tools inside the shelter with you. The last thing you want is to be trapped inside with your shovel buried in fresh snowfall outside! And remember, even a simple tree well shelter (the space around a tree trunk under its branches) can provide quick protection while you build something more substantial.
Natural Shelter Spots in Ontario Forests
Ontario’s forests offer several natural options for emergency shelter during cold weather. Look for large evergreen trees with dense, low-hanging branches – these create natural lean-to structures that block wind and retain heat. The space between the ground and lower branches often remains relatively snow-free, making it an ideal spot to huddle.
Rock formations and cliff faces can provide excellent windbreaks and sometimes feature small caves or overhangs. These natural shelters are particularly valuable because rock walls can retain heat from the day. Just be sure to check for signs of animal habitation before settling in.
Fallen trees, especially those with their root system exposed, create natural walls that can be enhanced with branches and snow to form a quick shelter. In areas with deep snow, look for tree wells – the snow-free spaces around tree trunks that can offer immediate protection from the elements.
Dense stands of cedar or spruce trees often create protected pockets where wind and snow penetration is minimal. These spots typically have a natural bed of dry needles that can provide insulation from the cold ground.
Remember to stay above low-lying areas where cold air settles, and always position your shelter entrance away from prevailing winds.
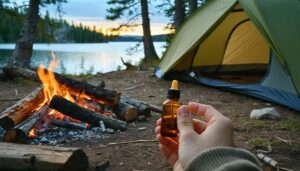
Fire-Starting in Wet Winter Conditions
Starting a fire in wet winter conditions can be challenging, but it’s often crucial for survival. I’ve learned through years of winter camping in Ontario that preparation is your best friend. Always carry at least two reliable fire starters – I recommend waterproof matches and a ferro rod – stored in a waterproof container.
The key to success is finding and protecting dry materials. Look for standing dead wood, as it contains less moisture than fallen logs. Pine resin, birch bark, and the tiny twigs found on the underside of evergreen branches are excellent natural fire starters that work even in wet conditions. Pro tip: the inside of tree bark, especially cedar, often stays dry even in the worst weather.
Before starting your fire, create a platform to keep it off the wet ground or snow. Layer dry sticks in a grid pattern or use a large piece of bark as a base. If you’re working in deep snow, pack it down firmly and create a platform using green logs.
Here’s my tried-and-true layering method:
– Start with your tinder (dry bark, dryer lint, or commercial fire starter)
– Add pencil-thick twigs in a teepee formation
– Gradually add larger sticks, maintaining good airflow
– Keep your kindling and fuel wood under your jacket to warm and dry it before use
Once your fire is going, protect it from snow and rain by creating a simple shelter. You can use a tarp, or in a pinch, construct a lean-to using evergreen boughs. Position your shelter to block the wind while allowing smoke to escape.
Remember to gather more firewood than you think you’ll need – wet conditions burn through fuel faster, and you’ll want to keep a good supply of dry wood near the fire to pre-dry before use. In Ontario’s winter wilderness, a sustainable fire can mean the difference between a comfortable night and a dangerous situation.
A local ranger once taught me that the best winter fires are built wide rather than tall, creating a better bed of coals that lasts longer and provides more consistent heat. It’s advice that’s served me well through many winter camping trips.
Finding Safe Water in Winter
Finding water in Ontario’s winter wilderness isn’t as challenging as you might think – if you know where to look! Snow and ice are your most readily available sources, but there’s a bit of technique involved in using them safely.
First up, never eat snow or ice directly – it lowers your body temperature and uses precious energy to melt it. Instead, collect clean snow (avoid yellow or discolored patches!) in your cooking pot or water bottle. Clear ice from lakes and streams is also excellent, and it actually requires less energy to melt than snow.
Here’s a nifty trick I learned from local guides: if you’re near a stream, look for moving water under the ice. These spots often have air pockets where you can break through more easily. The running water is usually safer to drink than standing water, though you should still purify it.
Speaking of purification, even in winter, you need to treat your water. Boiling is your best friend – it’s reliable and kills most harmful organisms. If you’re conserving fuel, you can use water purification tablets, but keep them in an inner pocket as they might freeze. A pro tip: warm up your filter if you’re using one, as frozen filters can crack and become useless.
My favorite wilderness hack: if you have a dark-colored water bottle, fill it with snow and keep it inside your jacket while moving. Your body heat will slowly melt the snow, giving you a steady supply of drinking water throughout the day. Remember to stay hydrated – it’s easy to forget to drink enough in cold weather!
Avoiding and Treating Cold Weather Injuries
Recognizing and treating cold weather injuries quickly can mean the difference between a minor setback and a life-threatening situation. As someone who’s led wilderness trips in Ontario for over a decade, I’ve learned that knowing these essential wilderness first aid skills is crucial for anyone venturing into our winter wonderland.
Hypothermia is your biggest enemy in cold conditions. Watch for the “umbles” – stumbling, mumbling, fumbling, and grumbling. These are early warning signs that someone’s core temperature is dropping. If you notice these symptoms, immediately get the person into dry clothes and shelter. Share body heat by huddling together, and provide warm (not hot) drinks if the person is alert.
Frostbite often sneaks up on you, especially on exposed skin and extremities. That tingling sensation in your fingers, toes, nose, or ears? Don’t ignore it! It’s your body’s early warning system. If skin becomes white and waxy-looking, you’re dealing with frostbite. Warm the affected area gradually using body heat – never rub it or apply direct heat, as this can cause more damage.
Another often-overlooked condition is trench foot, which occurs when feet stay wet and cold for too long. Change into dry socks whenever possible, and never sleep with wet footwear. I always pack an extra pair of wool socks in a waterproof bag – it’s saved my toes more than once!
To prevent these injuries, remember the acronym COLD:
– Clean: Keep clothes clean to maintain insulation
– Overdressing: Avoid sweating by removing layers when active
– Loose layers: Wear clothes loose enough for good circulation
– Dry: Stay dry at all costs; wet clothes are your worst enemy
If someone shows severe symptoms of any cold-related injury, don’t hesitate to call for help. In Ontario’s wilderness, it’s better to be overly cautious than to risk a life-threatening situation.
Surviving in Ontario’s winter wilderness isn’t just about knowing the right techniques – it’s about being prepared and keeping a level head when challenges arise. Remember, your greatest allies in cold weather survival are proper preparation, quick thinking, and a calm mindset.
Throughout this guide, we’ve covered essential strategies from building emergency shelters to finding safe water sources. But perhaps the most crucial takeaway is this: never venture into the wilderness without telling someone your plans and packing the basic survival essentials. A simple day hike can turn into an overnight situation faster than you might think.
Make it a habit to check weather forecasts, pack emergency supplies, and familiarize yourself with the area before heading out. Keep your survival kit updated and practice these skills during fair weather – you don’t want your first attempt at fire starting to be during an emergency.
Most importantly, remember that panic is your worst enemy in a survival situation. When things get tough, take a deep breath, assess your surroundings, and follow the priority sequence we’ve discussed: shelter, fire, water, and signaling for help.
By staying prepared, keeping calm, and applying these survival techniques, you’ll be better equipped to handle whatever winter challenges Ontario’s wilderness might throw your way. Stay safe, respect nature, and enjoy the beautiful winter landscape our province has to offer.


+ There are no comments
Add yours