

Check the official trail map before leaving home to identify which parking lots offer the amenities you need—washrooms, picnic areas, or bike repair stations vary dramatically between trailheads. Download offline maps to your phone since cell service disappears along many rural rail trails, and mark your parking location with a GPS pin so you can find your way back after hours of exploring.
Choose parking areas based on your planned distance and direction of travel, not just convenience. Starting at a mid-trail access point lets you explore in both directions, while endpoint parking works best for one-way adventures with a pickup arranged. Arrive before 10 AM on weekends during peak season, as popular trailheads fill quickly and roadside parking often violates local bylaws.
Look for the green “P” symbols on trailhead maps, which indicate official parking areas with proper surfaces and safety features. These designated lots protect your vehicle better than informal pulloffs and support trail maintenance through parking fees where applicable. Many rail trails offer multiple access points within a few kilometers—scout alternative lots during your first visit to discover quieter options with easier access for future trips.
Why Rail Trail Parking is Different (And Why You Need a Plan)
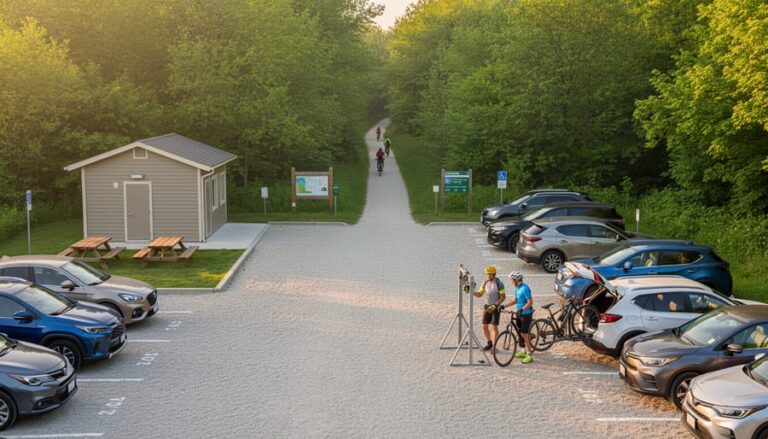
Here’s something I learned the hard way during my first rail trail adventure: parking at a rail trail isn’t quite like parking at your typical hiking spot. I rolled up to the Elora Cataract Trailway one sunny Saturday morning, only to find the main lot packed to the brim with cyclists, families with strollers, and even a few people unloading kayaks. Who knew?
Rail trails come with their own unique set of parking quirks that catch many first-timers off guard. Unlike single-destination hiking trails where everyone heads to one trailhead, rail trails stretch for miles—sometimes dozens of them—with multiple access points scattered along the route. Each trailhead might have completely different parking situations: some boast spacious paved lots with washrooms and picnic tables, while others offer nothing more than a grassy shoulder along a quiet rural road.
Seasonal crowding adds another layer of complexity. That peaceful Tuesday morning spot you scouted in April? It might be a zoo come July long weekend. Local regulations vary wildly too—some municipalities require permits or charge fees, while others offer free parking year-round. I’ve even encountered trailheads where parking is technically on private property with informal agreements for public access.
This is exactly why having a solid trailhead map becomes your best friend. Without one, you’re essentially driving blind, hoping to stumble upon the perfect spot. A good map shows you every access point, indicates which locations have proper facilities, and helps you identify less crowded alternatives. Think of it as your insider guide to avoiding frustration and maximizing your trail time. Trust me, spending five minutes studying a map beats circling around lost for half an hour any day.


Decoding Your Trailhead Parking Map: What Those Symbols Actually Mean
Parking Lot Size and Capacity Indicators
When you’re checking out trailhead maps online, look for subtle clues about parking capacity. Satellite view is your friend here! Small roadside pullouts typically accommodate 3-5 vehicles and work great for quiet weekday visits, but they fill up fast on summer weekends. You’ll spot these as narrow gravel strips alongside rural roads.
Mid-sized lots, usually showing 10-20 marked spaces on maps, are your sweet spot for flexibility. These handle moderate crowds and often include a portable toilet and basic trail information board.
Large staging areas with 50-plus spaces signal popular sections with excellent amenities. These dedicated facilities feature paved surfaces, proper washrooms, and sometimes even picnic areas. Here’s an insider tip: even big lots fill by 10 a.m. on gorgeous Saturday mornings during peak season, so arrive early or consider eco-friendly carpooling with fellow trail enthusiasts. If your chosen lot looks tiny on the map, simply scout alternative access points within a few kilometers as backup options.
Amenity Icons to Look For
When you’re scanning a rail trail map, those little symbols tell you everything you need to know about comfort and convenience. Washroom icons are your best friend on longer rides—trust me, knowing where facilities are located saves a lot of backtracking! Look for picnic table symbols if you’re planning a leisurely lunch stop; some trails have beautiful shaded areas perfect for refueling.
Water fountain icons are crucial during hot Ontario summers. I always fill my bottle at marked stations rather than carrying extra weight. Bike repair station symbols indicate spots with basic tools and air pumps—absolute lifesavers when you’re miles from your car with a flat tire.
Accessibility symbols show wheelchair-friendly sections and accessible parking spots. Many Ontario rail trails have beautifully paved segments ideal for strollers and mobility devices. Here’s an insider tip: trails with multiple amenity icons clustered together make excellent family-friendly starting points. These well-equipped access points often have shade structures and seating too, making them perfect rest stops for all ages and abilities.
Understanding Access Restrictions
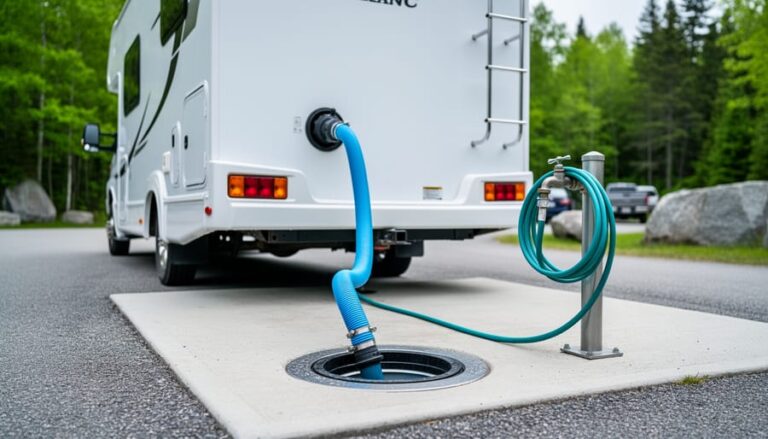
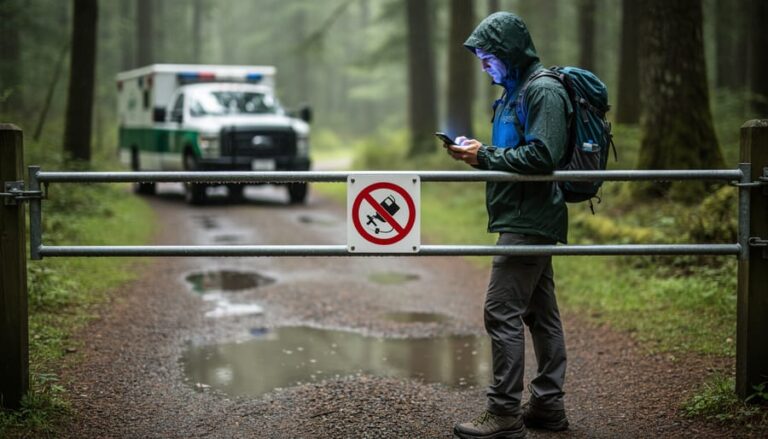
Before heading out, take a few minutes to study your trailhead map for important access details that could affect your visit. Look for symbols indicating seasonal closures, which often happen during mud season or winter months when maintenance becomes challenging. Many trails require permits or parking passes, typically noted with a dollar sign or ticket icon. Time restrictions are common too, with some lots closing at dusk to prevent overnight camping. Vehicle size matters as well—oversized RVs or trailers might not fit smaller trailhead parking areas. Insider tip: snap a photo of the map’s legend on your phone so you can reference restriction symbols easily while exploring different access points along the trail.
Strategic Trailhead Selection: Matching Parking to Your Adventure
For First-Timers and Families
If you’re new to rail trails or bringing the family along, choosing the right trailhead makes all the difference. Look for parking areas that offer plenty of space—nothing dampens enthusiasm like circling endlessly for a spot! The best beginner-friendly trailheads feature clear signage with distance markers and trail maps right at the entrance, so you’ll know exactly what to expect before you set off.
Pro tip: Pick trailheads near small towns where you can grab snacks, use clean restrooms, or reward the kids with ice cream afterward. These locations often have shorter, manageable segments perfect for little legs or those testing their fitness levels. Many family-favorite spots also include picnic areas and benches every kilometer or so—ideal for taking breaks without feeling pressure to complete a marathon distance.
An insider secret? Visit on weekday mornings when parking is plentiful and the trail feels like your own private pathway. You’ll avoid weekend crowds and can explore at your own pace, making it a stress-free introduction to Ontario’s wonderful rail trail network.

For Long-Distance Cyclists and Hikers
Planning a multi-day rail trail adventure? Here’s an insider tip: most trail maps show which parking areas allow overnight stays, usually marked with special symbols. Check these carefully before you set out, as many smaller access points enforce day-use-only policies.
For shuttle arrangements, I’ve found the best approach is identifying two trailheads about 20-30 kilometers apart. Drop one vehicle at your endpoint in the morning, then drive everyone back to your starting point. This works brilliantly on trails like the Waterfront Trail or Great Lakes Waterfront Trail. Some local taxi services and ride-shares have caught onto this need and offer reasonable rates for trail shuttles.
Look for parking areas near small towns rather than remote spots. They’re generally safer for overnight parking, often have amenities nearby, and you’ll support local businesses when you grab that well-deserved post-ride meal. Always snap a photo of any parking regulations posted at the trailhead, and consider leaving a visible note in your vehicle with your expected return date. Some trail organizations also maintain lists of bike-friendly accommodations near access points, perfect for breaking up longer journeys while keeping your vehicle secure.
For Weekend Warriors (Avoiding the Crowds)
Here’s my secret: the best rail trail experiences happen before most people finish their morning coffee. I’ve discovered that arriving by 7 AM on Saturday mornings transforms even popular trails into peaceful retreats. Your trailhead map is your treasure map here—look for access points marked farther from main roads or town centers. These spots typically have smaller parking lots that locals know about but tourists miss.
When studying your map, search for trailheads near rural intersections or beside conservation areas rather than near downtown cores. I once found a gem of a parking area tucked behind a country cemetery—only four spots, but I’ve never seen another car there on weekend mornings.
Another insider move? Check if your trail has weekday-only access points that businesses share on weekends. Some municipalities arrange agreements with church parking lots or community centers. Your map might show these with special symbols or notes. If you’re eco-conscious, consider carpooling to these smaller lots—you’ll reduce your footprint while leaving space for others to discover the trail’s magic too.
Real-World Parking Challenges (And How to Solve Them)
When Your Chosen Trailhead is Full
Don’t panic if you arrive to find your chosen trailhead packed. Pull out your map and scan for the nearest alternative access point. Most rail trails have multiple trailheads spaced 2-5 kilometers apart, giving you backup options within minutes.
Here’s a handy trick: use your finger or phone to measure distance on the map. Most trail maps include a scale bar, usually showing that one inch equals one or two kilometers. This quick calculation helps you decide whether to drive to the next access point or simply start walking from where you are.
I’ve discovered some of my favorite quiet trailheads this way! The lesser-known access points often have better amenities like picnic tables and benches, without the crowds. Pro tip: trailheads near small towns rather than major highways tend to fill up slower and offer easier parking year-round.
Keep your map handy on your phone or take a photo before you leave home. That way, you’re never stuck without options when parking gets tight.
Navigating Local Parking Regulations
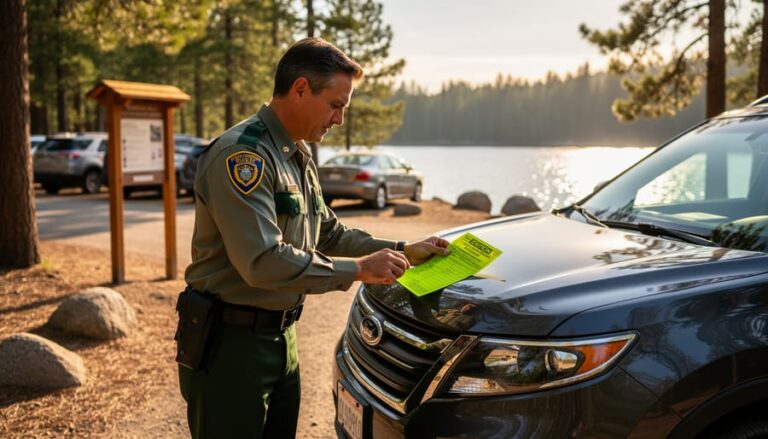
Here’s a friendly heads-up that’ll save you headaches: parking rules can vary wildly depending on whether you’re at a municipal lot or conservation area. Some rail trail parking is managed by local townships with free spots, while others fall under provincial parks requiring a day pass. Before you arrive, check the trail’s official website or scan posted signage carefully at the trailhead. Many Ontario conservation areas now use digital payment systems—download apps like HonkMobile or ParkBus ahead of time so you’re not scrambling for coins. Watch for time restrictions too; some lots have seasonal hours that change between summer and winter. Pro tip: snap a photo of parking signs with your phone as proof if you get an unfair ticket. To avoid towing, never block gates or park on soft shoulders after rain—locals know which spots get muddy fast! If a lot looks full, ask fellow hikers about overflow parking nearby rather than risking a violation.
Winter and Seasonal Access Issues
Winter transforms rail trail parking into a different beast entirely. Many trailheads close seasonally due to snow removal costs or safety concerns, leaving you stranded if you don’t check ahead. Smart trail maps often indicate which lots stay open year-round—look for snowflake icons or winter access notes in the legend.
Here’s an insider tip: municipal lots near downtown trail access points typically maintain winter service, while rural trailheads might go unplowed for months. Before heading out during colder months, cross-reference your map with seasonal access issues posted on official websites. Some trails also welcome winter activities like snowshoeing and cross-country skiing, making those maintained parking areas real gems for year-round adventurers seeking eco-friendly cold-weather exercise.
Eco-Friendly Parking Tips for Responsible Trail Users
Making responsible choices at rail trail parking areas helps preserve these beautiful spaces for everyone to enjoy. I’ve seen firsthand how small actions can make a big difference, and the good news is that eco-friendly parking practices are easier than you might think.
Carpooling is one of the simplest ways to reduce your environmental footprint. When I visit popular trails on weekends, I’m always impressed by groups who coordinate their arrivals. Try connecting with fellow trail enthusiasts through local hiking groups or social media communities. Not only does carpooling reduce vehicle emissions and parking congestion, but it also makes the experience more social and often splits gas costs too.
Public transit is another fantastic option for accessing many Ontario rail trails. Several trailheads are surprisingly accessible by bus or train, especially near urban areas. I recently discovered that taking transit to a trail actually enhanced my adventure – no worrying about parking availability, and the journey itself became part of the experience.
Once you arrive, practice leave-no-trace principles at parking areas. Dispose of any garbage properly, stick to designated parking spots to avoid damaging vegetation, and avoid idling your vehicle unnecessarily. If you notice the lot is full, resist the temptation to create makeshift parking spaces that might harm sensitive areas nearby.
Consider visiting during off-peak hours when possible. Early morning or weekday visits mean less competition for parking spots and reduced environmental strain on popular access points. Plus, you’ll enjoy a more peaceful trail experience with fewer crowds.
Digital Tools and Resources to Enhance Your Trailhead Map
Your physical trail map is just the starting point—today’s digital tools can transform your parking experience from guesswork into a seamless adventure. I’ve learned this firsthand after arriving at a packed trailhead on a sunny Saturday, only to discover a nearly empty lot just three kilometers away.
Start by downloading trail-specific apps that show real-time parking availability. While not all rail trails offer this feature yet, many popular routes now provide near-real time updates through their websites or partner apps. AllTrails and TrailLink are excellent companions, offering user-generated parking reviews that reveal which lots fill up fastest and which have the best facilities.
Google Maps remains invaluable for GPS navigation to lesser-known access points—simply search the trail name plus “parking” to see all available lots. Insider tip: enable offline maps before heading out, especially in rural areas where cell service gets spotty.
Check social media groups dedicated to your chosen trail. Local hiking communities often share morning parking updates and weather alerts. I follow several Ontario trail groups that post real-time photos of lot conditions—it’s like having scouts reporting from the field! These digital resources work beautifully alongside your paper map, helping you make informed decisions and discover hidden gems you might otherwise miss.
Here’s the thing about rail trail adventures: a little parking homework goes an incredibly long way. I’ve learned this lesson the hard way, arriving at full lots on beautiful weekends and scrambling to find alternatives. But once you’ve spent ten minutes studying your trailhead map and scoping out your options, everything changes. You’ll roll up to your chosen parking area with confidence, knowing exactly where you’re going and what backup spots exist if needed.
Think of your parking map as the secret ingredient to a stress-free day. It tells you which trailheads have washrooms, which ones connect to nearby towns for post-ride snacks, and where you’ll find those quieter access points when you’re craving solitude. This simple planning step transforms a potentially frustrating scramble into a smooth, enjoyable experience from the moment you leave home.
So grab that map, mark your spots, and maybe even save an offline version on your phone as an eco-friendly backup. Ontario’s rail trails are waiting for you, ribbons of adventure stretching through gorgeous landscapes with welcoming parking areas ready to launch your journey. Get out there and explore with confidence!


+ There are no comments
Add yours